“`html
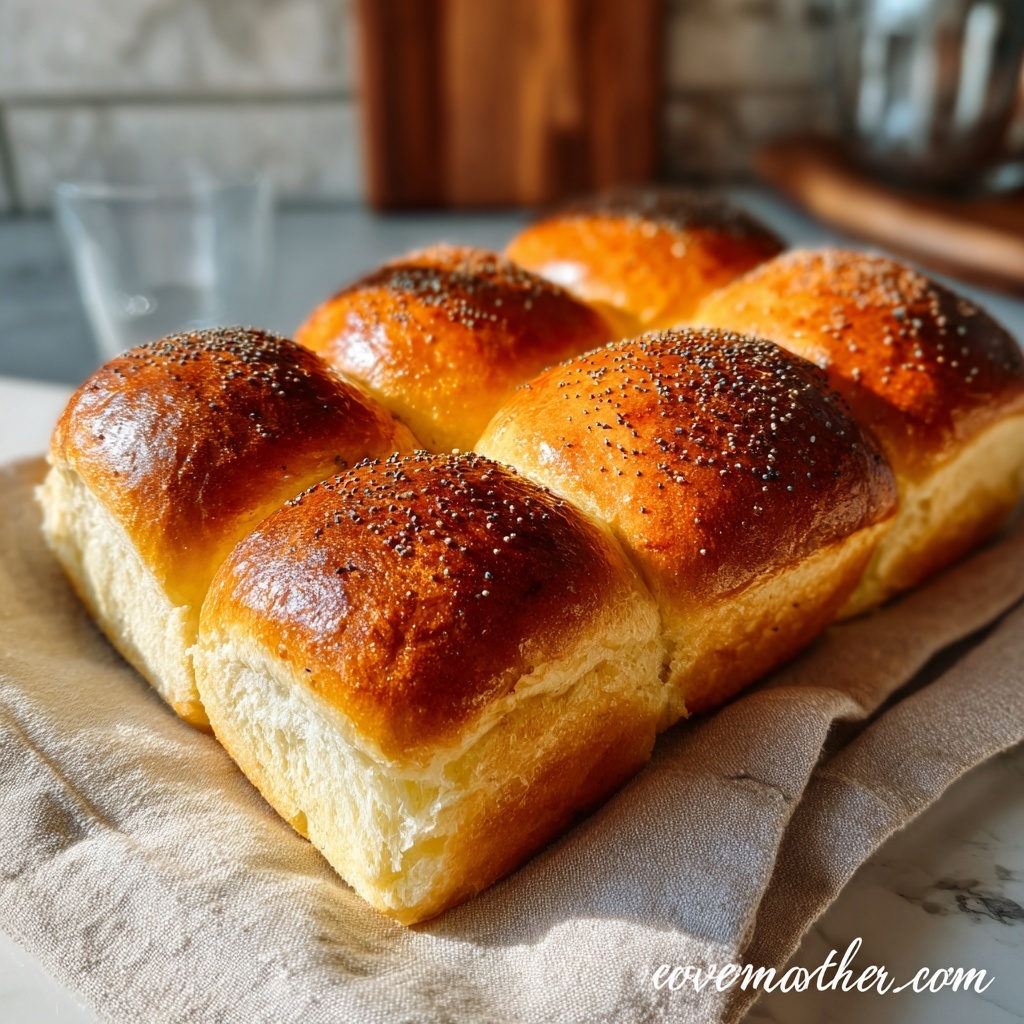
If you’ve been searching for that ideal bread recipe to brighten up your breakfast table or elevate any meal, you’ve just struck gold with the Poppy Seed Yeast Rolls: Fluffy and Perfect Every Time Recipe. These rolls are a dream come true: irresistibly soft, lightly sweet, with the delightful crunch and subtle nuttiness of poppy seeds sprinkled on top. They bring both a cozy warmth and a touch of elegance to every bite, proving that homemade bread can be approachable and absolutely delightful.

Ingredients You’ll Need
These ingredients are straightforward yet essential, each playing a vital role in crafting soft, flavorful rolls with that perfect tender crumb and golden crust. From the warmth of milk activating the yeast to the golden richness of butter and eggs, everything comes together to create magic.
- 4 cups all-purpose flour: The sturdy base that forms the dough’s structure and gives rolls their fluffy body.
- 1 packet (2 1/4 tsp) active dry yeast: The tiny powerhouse responsible for making your rolls rise beautifully and become airy.
- 1/4 cup sugar: Adds a subtle sweetness and helps feed the yeast for a lively rise.
- 1 tsp salt: Balances flavor and enhances the dough’s taste while regulating yeast activity.
- 1 cup warm milk: Warms things up to kickstart yeast activation while enriching the dough for softness.
- 1/4 cup unsalted butter, melted: Adds tender flakiness and a creamy depth to every bite.
- 2 large eggs: Bind ingredients together and lend richness and a tender crumb to the rolls.
- 3 tbsp poppy seeds: For that signature crunch and delightful nutty note sprinkled on top.
How to Make Poppy Seed Yeast Rolls: Fluffy and Perfect Every Time Recipe
Step 1: Activate the yeast
Start by combining warm milk with the active dry yeast. Let this mixture rest for about 5 minutes until it becomes foamy and bubbly. This means your yeast is alive and well, which is the secret to getting those fluffy rolls that seem to melt in your mouth.
Step 2: Combine wet ingredients and seasonings
Add sugar, salt, melted butter, and eggs to the yeast mixture. Mix thoroughly to create a smooth, fragrant base. Each of these ingredients contributes to flavor, texture, and the dough’s elasticity, setting the stage for the perfect roll consistency.
Step 3: Gradually incorporate the flour
Slowly add the flour into the wet mix, stirring as you go, until a shaggy dough begins to form. Adding flour gradually helps you control the dough’s consistency so it’s not too sticky nor too dry, making kneading much easier.
Step 4: Knead until smooth
Turn the dough out onto a clean surface and knead it for about 5 to 7 minutes. This step is key, as kneading develops gluten, which gives the rolls their chewy but tender texture. You’ll know it’s ready when the dough feels soft and slightly elastic to the touch.
Step 5: First rise
Place your dough in a greased bowl, cover it with a clean towel or plastic wrap, and let it rise in a warm spot for 1 hour. During this time, the dough should double in size as the yeast works its magic, creating those airy pockets inside your rolls.
Step 6: Shape the rolls
Punch down the risen dough to release excess air, then divide and shape the dough into individual rolls. This hands-on part is so rewarding because you’re turning simple ingredients into something special and personal.
Step 7: Prepare rolls for their second rise
Arrange the rolls in a greased baking dish and generously sprinkle poppy seeds on top for that irresistible crunch and unique flavor. Cover the dish and allow the rolls to rise for another 30 minutes. This second rise gives them that extra lift and lightness every great roll should have.
Step 8: Bake to golden perfection
Preheat your oven to 350°F (175°C). Bake the rolls for 20 to 25 minutes, or until they develop a beautiful golden brown color on top. The aroma filling your kitchen at this point is pure comfort, and the sight of these golden gems will have your mouth watering in anticipation.
How to Serve Poppy Seed Yeast Rolls: Fluffy and Perfect Every Time Recipe
Garnishes
While the poppy seeds provide a natural finish, try brushing the hot rolls with melted butter right out of the oven for a shiny, rich glaze. You can also add a sprinkle of sea salt or even a dash of honey for a touch of sweet-salty contrast.
Side Dishes
These rolls are incredibly versatile. Serve them alongside hearty soups, fresh salads, or as the perfect partner to a cheese board. They also shine with classic breakfast spreads like jam, cream cheese, or a dollop of butter, turning any meal into a celebration.
Creative Ways to Present
For a fun twist, slice these rolls horizontally and layer with smoked salmon, cucumber, and dill for an elegant tea-time treat. Or toast them lightly and use for sliders filled with your favorite savory fillings — the poppy seeds add a delicate crunch that elevates every bite.
Make Ahead and Storage
Storing Leftovers
If you have any leftovers (though they rarely last long), store them in an airtight container at room temperature for 3 to 4 days. This keeps the rolls soft and fresh, ready to be enjoyed as snacks or part of another meal.
Freezing
Want to save them for later? Freeze the rolls in an airtight bag or container for up to 3 months. Make sure they are completely cooled before freezing to maintain their fluffy texture when thawed.
Reheating
To bring back that freshly baked warmth, reheat rolls wrapped in foil at 300°F (150°C) for about 10 minutes in the oven. Alternatively, a quick zap in the microwave for 15 seconds does the trick when you’re in a hurry but craving that softness.
FAQs
Can I use bread flour instead of all-purpose flour?
Absolutely! Bread flour has a higher protein content, which will produce rolls with a chewier texture. Both work well, so feel free to experiment to find your favorite.
Do I have to use poppy seeds? Can I substitute something else?
Poppy seeds are part of what makes this recipe special, offering crunch and a subtle nutty flavor. However, you can sprinkle sesame seeds, nigella seeds, or even everything bagel seasoning for a different but delicious twist.
How warm should the milk be to activate yeast?
Warm the milk to around 100°F to 110°F (38°C to 43°C). It should feel pleasantly warm to the touch, not hot, as excessive heat can kill the yeast and prevent the dough from rising.
Can I prepare the dough the night before?
Yes! After kneading, cover the dough tightly and refrigerate overnight. The slow rise will deepen the flavor. Just remember to let it come to room temperature and complete the rising phases before baking.
What if my dough doesn’t rise well?
Check your yeast freshness first; expired yeast won’t activate properly. Also, the temperature of milk and rising environment matters — yeast loves a warm, draft-free spot. Give it some time, and patience usually pays off with fluffy rolls.
Final Thoughts
Making Poppy Seed Yeast Rolls: Fluffy and Perfect Every Time Recipe is such a rewarding experience, and once you taste these soft, tender rolls fresh from the oven, you’ll wonder why you didn’t bake your own bread sooner. Whether for daily breakfasts or special gatherings, this recipe brings a sense of joy and comfort that’s simply irresistible. I can’t wait for you to try it and share the warmth with those you love!
“`
Print
Poppy Seed Yeast Rolls: Fluffy and Perfect Every Time Recipe
- Prep Time: 20 minutes
- Cook Time: 25 minutes
- Total Time: 1 hour 45 minutes
- Yield: 12 servings
- Category: Bakery/Breads
- Method: Baking
- Cuisine: American
Description
These Poppy Seed Yeast Rolls are soft, fluffy, and lightly sweetened, perfect for breakfast or as a delightful side. Made with simple ingredients and a classic yeast dough, they are topped with nutty poppy seeds for a slight crunch and extra flavor. Follow the easy steps for perfectly risen, golden brown rolls that everyone will love.
Ingredients
Basic Dough Ingredients
- 4 cups all-purpose flour
- 1 packet (2 1/4 tsp) active dry yeast
- 1/4 cup sugar
- 1 tsp salt
- 1 cup warm milk
- 1/4 cup unsalted butter, melted
- 2 large eggs
Topping
- 3 tbsp poppy seeds
Instructions
- Activate Yeast: In a bowl, combine warm milk and active dry yeast. Allow it to sit for 5 minutes until the mixture becomes frothy, indicating the yeast is activated.
- Mix Wet Ingredients: Add sugar, salt, melted butter, and eggs to the yeast mixture. Mix thoroughly to combine all wet ingredients evenly.
- Add Flour and Form Dough: Gradually incorporate the all-purpose flour into the wet mixture, mixing continuously until a dough begins to form.
- Knead Dough: Transfer the dough to a lightly floured surface and knead for 5-7 minutes until it becomes smooth and elastic.
- First Rise: Place the dough in a greased bowl and cover it with a clean cloth or plastic wrap. Let it rise in a warm place for 1 hour, or until it doubles in size.
- Shape Rolls: Punch down the risen dough to release excess air and divide it into individual portions. Shape each portion into a roll.
- Prepare for Second Rise: Place the rolls in a greased baking dish. Sprinkle the tops evenly with poppy seeds.
- Second Rise: Cover the rolls and let them rise again for 30 minutes until puffed.
- Bake Rolls: Preheat the oven to 350°F (175°C). Bake the rolls for 20-25 minutes or until they turn golden brown on top and sound hollow when tapped.
Notes
- Ensure the milk is warm, not hot, to avoid killing the yeast.
- For a richer flavor, you can brush the tops of the rolls with melted butter right after baking.
- Poppy seeds add a pleasant crunch but can be omitted or substituted with sesame seeds if preferred.
- Allow rolls to cool slightly before serving for best texture.
- These rolls freeze well; thaw and warm before serving.


