“`html
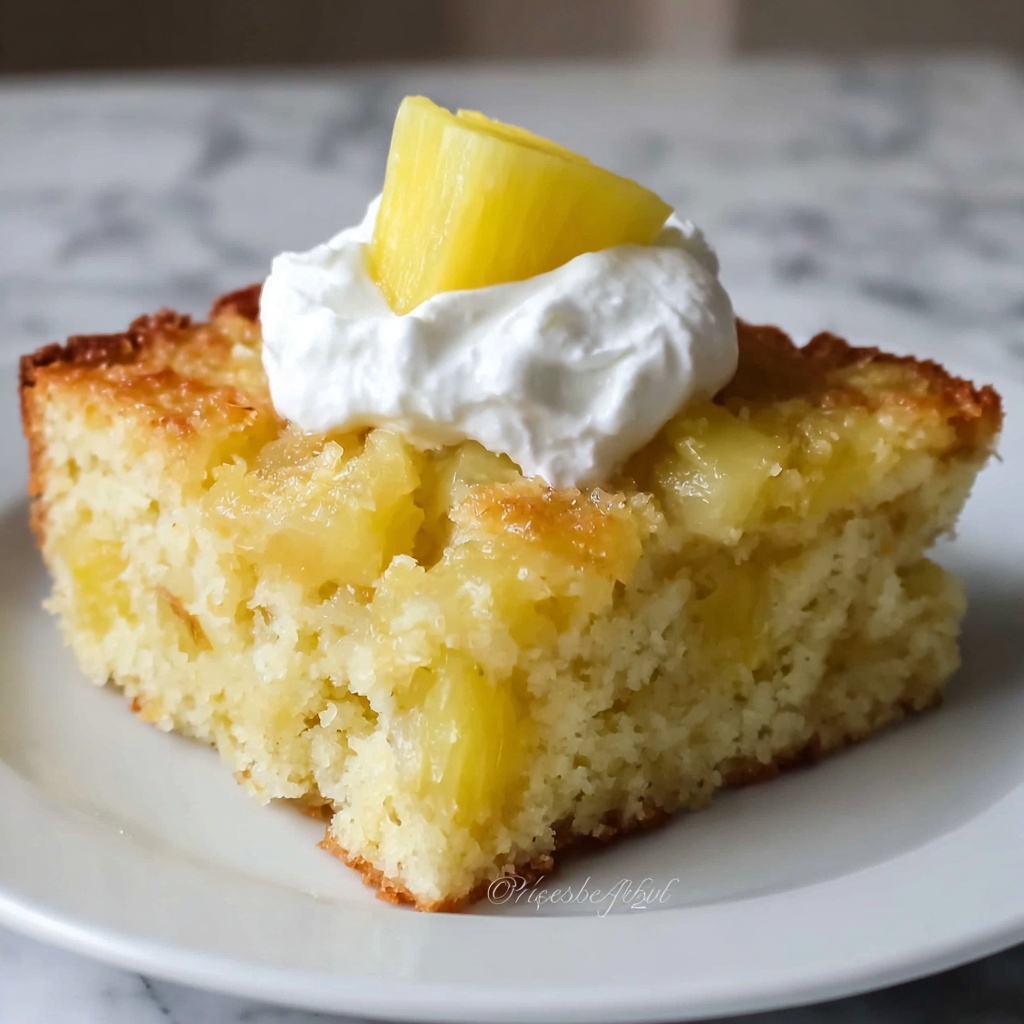
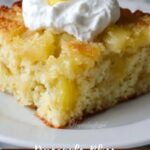
If you have a soft spot for cakes that are moist, flavorful, and just absolutely bursting with tropical charm, then you are in for a real treat with the Juicy Pineapple Heaven Cake: 5 Secrets to Blissful Baking Recipe. This cake is a sublime balance of sweet pineapple, buttery richness, and tender crumb that makes every bite feel like a mini celebration. It’s the kind of dessert that comforts you and delights your taste buds simultaneously, making it perfect for family gatherings, potlucks, or simply indulging yourself on a lazy afternoon.
Ingredients You’ll Need
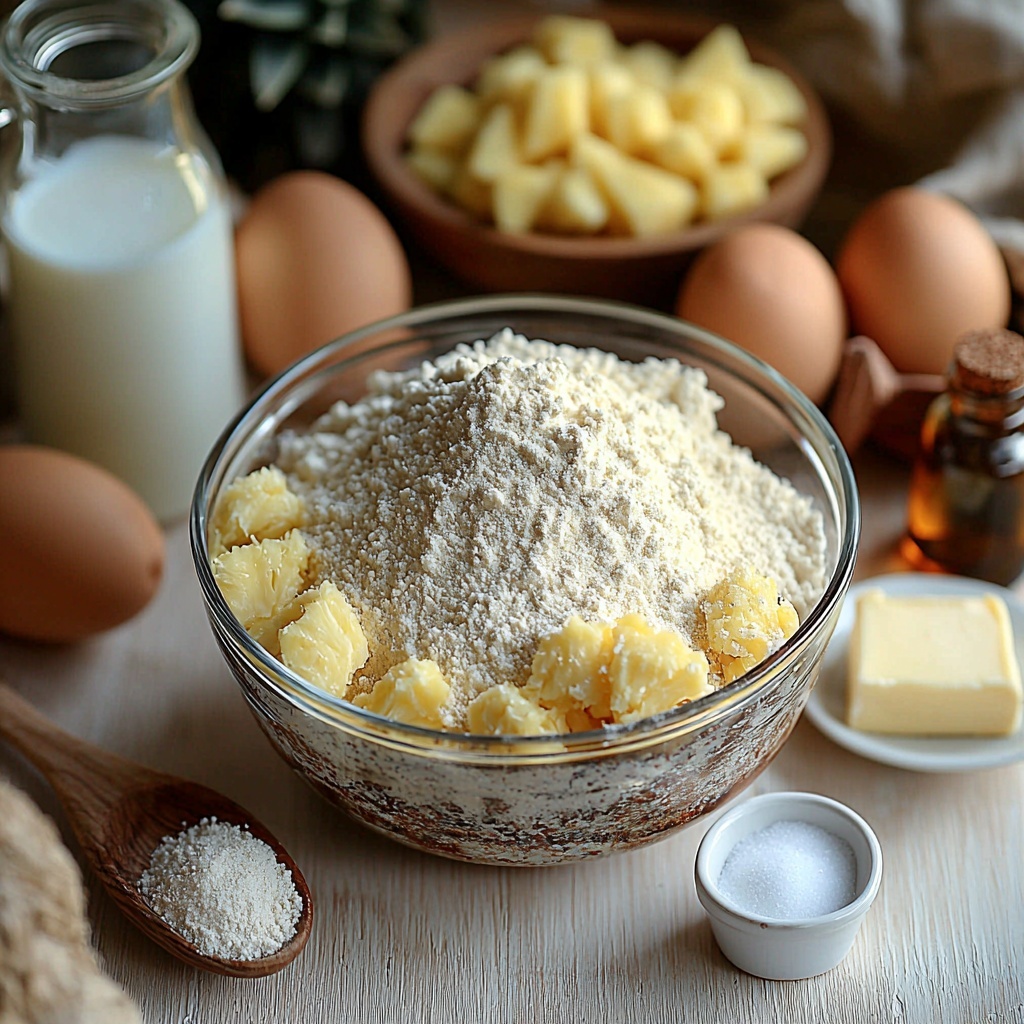
Sometimes the simplest ingredients come together to create the most unforgettable cakes, and this recipe is no exception. Each ingredient is thoughtfully chosen for its role in delivering that dreamy texture, balanced sweetness, and that unmistakable pineapple brightness.
- 2 cups all-purpose flour: Provides the foundation that gives the cake its tender crumb.
- 1 1/2 cups granulated sugar: Sweetens the cake and helps achieve that perfect golden crust.
- 1 cup unsweetened crushed pineapple, drained: Adds juicy, tropical flavor and moisture without overpowering the sweetness.
- 1/2 cup unsalted butter, softened: Brings richness and a velvety texture to the batter.
- 1/2 cup milk: Makes the batter smooth and helps keep the cake moist.
- 3 large eggs: Provide structure and build the cake’s lift.
- 1 teaspoon baking powder: The rising agent that helps the cake fluff up beautifully.
- 1/2 teaspoon baking soda: Enhances the rise and contributes to tenderness when paired with pineapple.
- 1 teaspoon vanilla extract: Balances the tartness with warm, sweet notes.
- 1/4 teaspoon salt: Crucial for amplifying all the flavors in the cake.
How to Make Juicy Pineapple Heaven Cake: 5 Secrets to Blissful Baking Recipe
Step 1: Preheat and Prepare
Begin by preheating your oven to 350°F (175°C) and generously greasing and flouring a 9×13 inch baking pan. This step ensures your cake bakes evenly and won’t stick, laying the groundwork for blissful baking perfection.
Step 2: Cream Butter and Sugar
Using a bowl, cream together the softened unsalted butter and granulated sugar until the mixture is light and fluffy. This process traps air to help give your cake an airy, tender texture.
Step 3: Add Eggs One at a Time
Mix in the eggs, one by one, ensuring each is fully incorporated before adding the next. This careful mixing enriches the batter while maintaining that delicate crumb you crave.
Step 4: Stir in Vanilla and Pineapple
Next, gently fold in the vanilla extract and the perfectly drained crushed pineapple. This is when the cake starts to take on its signature tropical personality, infusing moisture and sweetness.
Step 5: Combine Dry Ingredients and Alternate Adding with Milk
In a separate bowl, sift together the all-purpose flour, baking powder, baking soda, and salt. Gradually add these dry ingredients to the wet mixture, alternating with the milk. This alternating method helps achieve an even batter and prevents overmixing, which means a tender crumb every time.
Step 6: Bake to Golden Perfection
Pour your batter into the prepared pan, spreading it evenly. Bake for 30-35 minutes, or until a toothpick inserted into the center comes out clean. When you open that oven door to the warm aroma and see the cake’s golden top, you’ll know paradise awaits!
Step 7: Cool Before Serving
Allow the cake to cool completely in the pan before slicing and serving. This cooling step lets the flavors meld and the texture set perfectly, enhancing every bite of your Juicy Pineapple Heaven Cake: 5 Secrets to Blissful Baking Recipe.
How to Serve Juicy Pineapple Heaven Cake: 5 Secrets to Blissful Baking Recipe
Garnishes
Keep it simple with a light dusting of powdered sugar or add a dollop of whipped cream to play up the cake’s natural sweetness. For a festive touch, sprinkle with toasted coconut flakes or even a few maraschino cherries—each adding pretty pops of color and texture.
Side Dishes
This cake pairs wonderfully with a scoop of vanilla ice cream or a fresh fruit salad featuring berries and kiwi to complement its tropical vibe. A hot cup of tea or coffee also balances the sweetness and makes your dessert experience extra cozy.
Creative Ways to Present
Turn your Juicy Pineapple Heaven Cake into mini individual servings by cutting it into squares and placing each on a pretty dessert plate with a fresh pineapple leaf or edible flower. You can also layer it as a trifle with whipped cream and pineapple chunks for a show-stopping dessert centerpiece.
Make Ahead and Storage
Storing Leftovers
Store any leftover cake in an airtight container in the refrigerator for 3-4 days. This helps maintain its moist texture and keeps the flavors vibrant, so you can savor a slice whenever the craving strikes.
Freezing
To freeze, wrap the cake tightly in plastic wrap and then foil, or place it in a freezer-safe container. It will keep beautifully for up to 2 months. Thaw overnight in the fridge before enjoying to restore that fresh-from-the-oven magic.
Reheating
If you want a warm, comforting slice, gently warm portions in the microwave for 15-20 seconds. This quick step revives moisture and melts any accompaniments like butter or cream for maximum indulgence.
FAQs
Can I use fresh pineapple instead of crushed?
Fresh pineapple can be used, but be sure to finely chop and drain it well to prevent excess moisture from making the cake soggy. Crushed pineapple provides consistent texture and juiciness perfect for this recipe.
Is there a gluten-free alternative for the flour?
Absolutely! You can substitute the all-purpose flour with a 1:1 gluten-free baking flour blend, but make sure it contains xanthan gum or a similar binding agent to maintain the cake’s structure.
Can I make this cake vegan?
To make it vegan, replace butter with a plant-based margarine and use a non-dairy milk like almond or oat milk. Swap eggs with flax eggs (1 tablespoon flaxseed meal + 3 tablespoons water per egg) and the cake will still please your palate.
How do I know when the cake is perfectly baked?
The best test is a clean toothpick inserted into the center. If it comes out with no wet batter and only a few moist crumbs, the cake is ready. Also, the top should be golden and spring back slightly to the touch.
Can I add nuts or other mix-ins?
You can! Chopped macadamia nuts or shredded coconut complement the tropical flavors beautifully. Add about 1/2 cup into the batter after the wet and dry ingredients are combined for added texture and nuttiness.
Final Thoughts
There’s something truly magical about the Juicy Pineapple Heaven Cake: 5 Secrets to Blissful Baking Recipe that makes baking and sharing it feel like an act of joy. Its moist crumb, tangy-sweet pineapple essence, and warm vanilla notes come together in perfect harmony. I wholeheartedly encourage you to try this recipe—it’s sure to become a beloved classic in your home, just like it is in mine!
“`
Print
Juicy Pineapple Heaven Cake: 5 Secrets to Blissful Baking Recipe
- Prep Time: 15 minutes
- Cook Time: 35 minutes
- Total Time: 50 minutes
- Yield: 12 servings
- Category: Dessert
- Method: Baking
- Cuisine: American
Description
This Juicy Pineapple Heaven Cake is a moist and flavorful dessert featuring crushed pineapple blended into a simple yet rich batter. Perfectly balanced with vanilla and spices, this cake offers a blissful baking experience that’s sure to delight with its tender crumb and tropical sweetness.
Ingredients
Wet Ingredients
- 1/2 cup unsalted butter, softened
- 1 1/2 cups granulated sugar
- 3 large eggs
- 1 teaspoon vanilla extract
- 1 cup unsweetened crushed pineapple, drained
- 1/2 cup milk
Dry Ingredients
- 2 cups all-purpose flour
- 1 teaspoon baking powder
- 1/2 teaspoon baking soda
- 1/4 teaspoon salt
Instructions
- Preheat Oven: Preheat your oven to 350°F (175°C) to prepare for baking the cake evenly.
- Prepare Pan: Grease and flour a 9×13 inch baking pan to prevent the cake from sticking and promote easy removal.
- Cream Butter and Sugar: In a mixing bowl, cream together the softened butter and granulated sugar until the mixture becomes light and fluffy, providing the cake with a tender texture.
- Add Eggs: Incorporate the eggs one at a time into the creamed mixture, beating well after each addition to ensure full incorporation and a smooth batter.
- Add Vanilla and Pineapple: Stir in the vanilla extract and drained crushed pineapple until evenly distributed, adding moisture and flavor to the batter.
- Mix Dry Ingredients: In a separate bowl, combine the all-purpose flour, baking powder, baking soda, and salt, ensuring they are evenly mixed to help the cake rise properly.
- Combine Wet and Dry Ingredients: Gradually add the dry ingredients to the wet mixture, alternating with milk, mixing just until combined to avoid overworking the batter which could make the cake tough.
- Pour Batter into Pan: Transfer the batter into the prepared baking pan, spreading it evenly for uniform baking.
- Bake the Cake: Bake in the preheated oven for 30-35 minutes or until a toothpick inserted into the center comes out clean, indicating the cake is fully cooked.
- Cool and Serve: Allow the cake to cool in the pan before slicing and serving to let the flavors settle and the texture set.
Notes
- Be sure to drain the crushed pineapple well to avoid excess moisture in the batter, which can affect the cake’s texture.
- You can substitute milk with a non-dairy alternative if desired, to make it dairy-free.
- For an added tropical twist, consider adding shredded coconut or chopped nuts to the batter.
- Use room temperature ingredients to ensure smooth mixing and better texture.
- Store leftover cake in an airtight container at room temperature for up to 3 days or refrigerate for up to 5 days.

