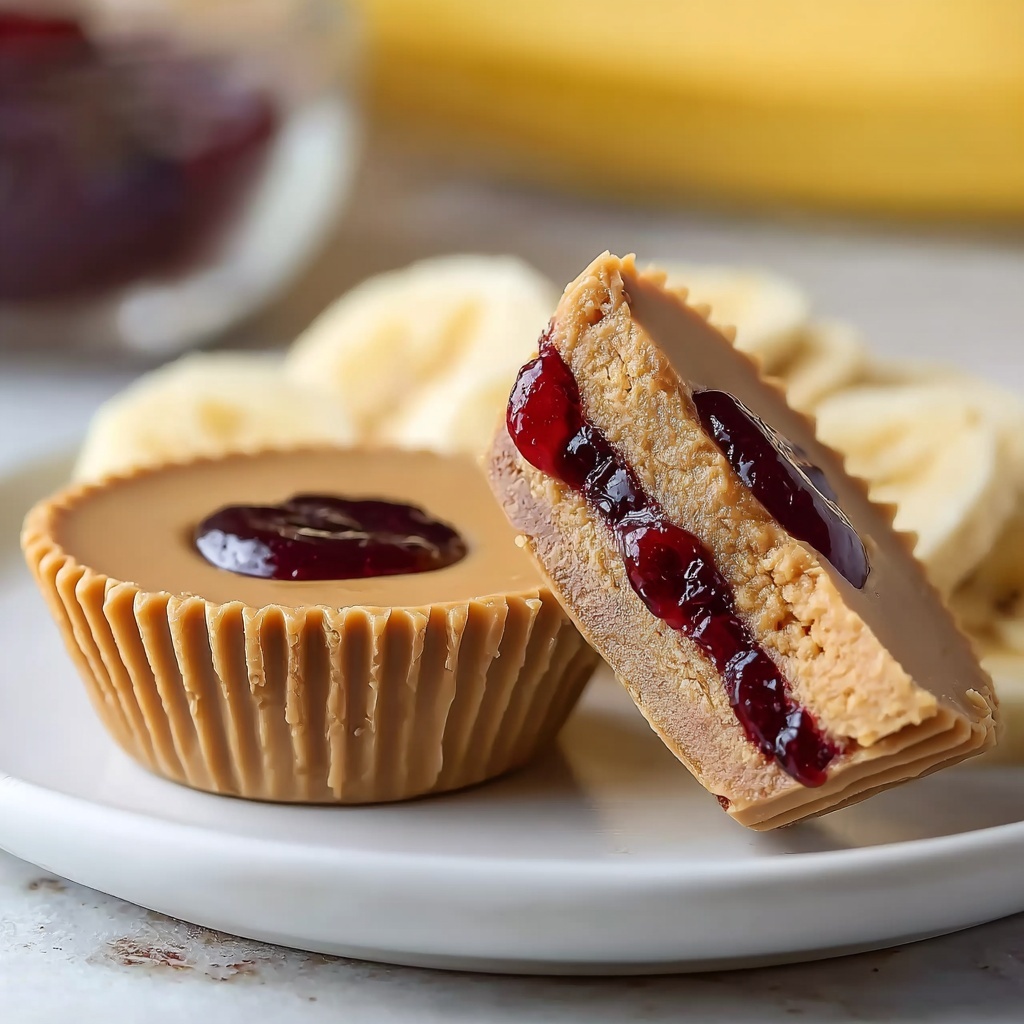
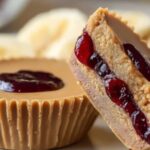
If you’re a fan of that classic childhood combo, this Peanut Butter & Jelly Cups Recipe is going to steal your heart all over again. Imagine creamy peanut butter mingling with your favorite jelly, all wrapped up in a luscious chocolate shell that adds just the right amount of snap and sweetness. These delightful little treats are fun to make, irresistibly tasty, and perfect for any occasion when you want a quick bite of nostalgia with a sophisticated twist.
Ingredients You’ll Need
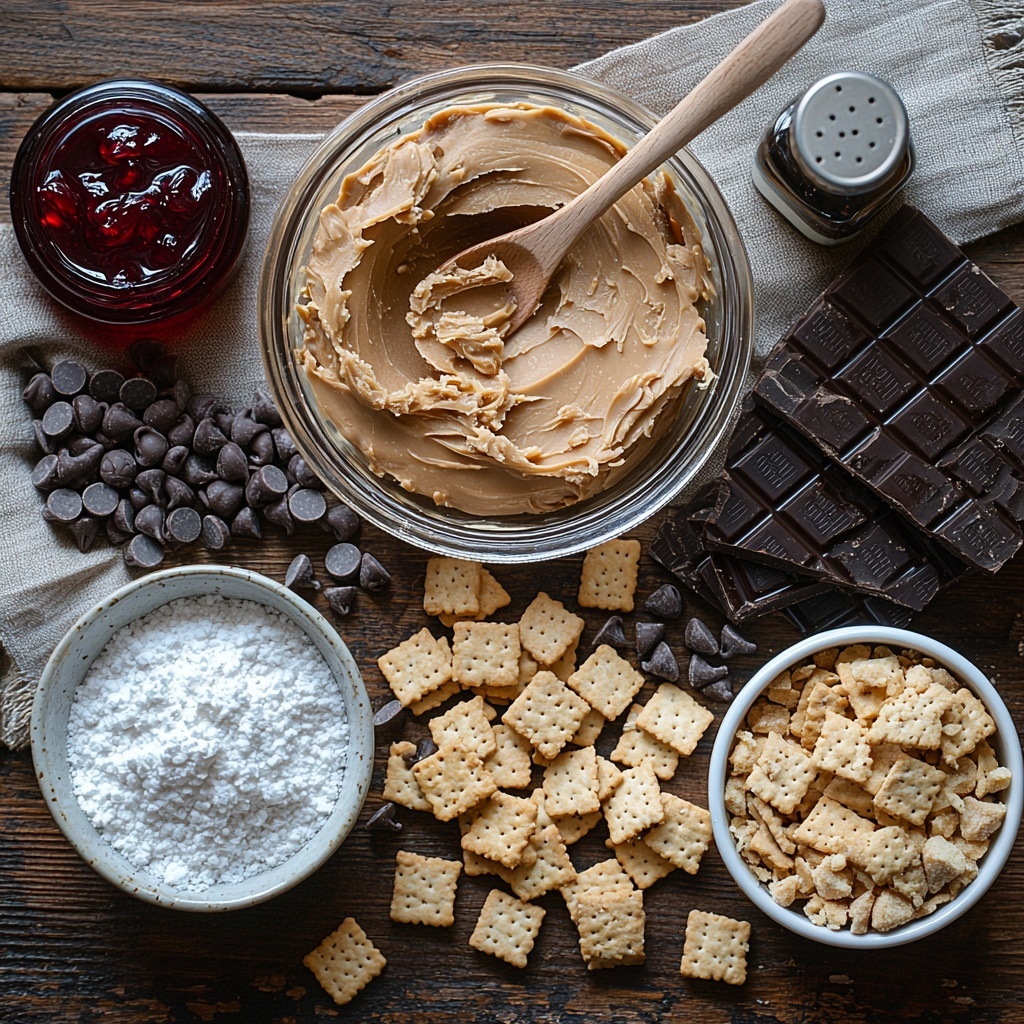
These ingredients are refreshingly simple but truly essential because each one plays a starring role. From the rich chocolate that forms the perfect shell to the crunchy graham cracker crumbs in the peanut butter filling, every component contributes to the lovely textures and flavors that make these cups unforgettable.
- 1 cup semi-sweet chocolate chips: Provides a smooth, slightly bitter shell that balances the sweetness inside perfectly.
- 1 tablespoon coconut oil (optional): Helps melt the chocolate to a glossy, silky consistency that’s easy to work with.
- 1 cup creamy peanut butter: Acts as the rich and creamy base for the filling; natural or regular works great.
- 1/2 cup powdered sugar: Sweetens the peanut butter just enough without overpowering.
- 1/4 cup graham cracker crumbs: Adds a subtle crunch and a hint of toasted flavor to the filling.
- 1/2 teaspoon vanilla extract: Elevates the flavor profile with gentle warmth and depth.
- Pinch of salt: Enhances all the other flavors, bringing everything into harmony.
- 1/2 cup jelly or jam: Your choice of flavor, from classic strawberry to tangy raspberry, adds a fruity burst that truly makes these cups shine.
How to Make Peanut Butter & Jelly Cups Recipe
Step 1: Melt the Chocolate
Start by combining your chocolate chips and coconut oil in a microwave-safe bowl. Microwave in 30-second intervals, stirring after each, until your chocolate is melted and irresistibly smooth. This step sets the stage for a glossy, easy-to-handle chocolate shell.
Step 2: Prepare the Muffin Tin
Line each cup of a muffin tin with paper liners or silicone cups to make sure your treats pop right out once they’re set. This also keeps cleanup incredibly easy.
Step 3: Add the Chocolate to Liners
Spoon a small pool of melted chocolate into the bottom of each liner. Use the back of the spoon to gently push a bit of chocolate up the sides, creating a delicate cup to hold all the wonderful filling.
Step 4: Chill the Chocolate
Pop the muffin tin into the refrigerator for 10 to 15 minutes so the chocolate can firm up. This crucial chill helps maintain those lovely cup shapes when you add the peanut butter mixture.
Step 5: Mix the Peanut Butter Filling
In a medium bowl, combine creamy peanut butter, powdered sugar, graham cracker crumbs, vanilla extract, and a pinch of salt. Mix until smooth with a slight texture from the crumbs—this filling is what will make these cups so addictive.
Step 6: Fill the Chocolate Cups
Remove the muffin tin from the fridge, then spoon the peanut butter mixture into each chocolate-lined cup until about three-quarters full. This ensures you have room left for the jelly and final chocolate layer.
Step 7: Add the Jelly Layer
Top each peanut butter-filled cup with a spoonful of your favorite jelly or jam. Form a little well in the center of the peanut butter to nestle in that fruity sweetness perfectly.
Step 8: Cover with Remaining Chocolate
Pour the remaining melted chocolate over the jelly layer to fully seal in the goodness. Gently tap the muffin tin against your counter to even out the chocolate and remove any air bubbles.
Step 9: Chill Again
Pop the muffin tin back in the fridge for another 15 to 20 minutes to allow the chocolate topping to harden completely, ensuring each cup has that satisfying snap.
Step 10: Remove from Tin and Enjoy
Once set, carefully peel off the liners and savor your Peanut Butter & Jelly Cups. Whether as a snack or a special dessert, these treats are sure to bring a smile.
How to Serve Peanut Butter & Jelly Cups Recipe
Garnishes
For a little extra flair, consider sprinkling some crushed peanuts or a few graham cracker crumbs on top of the final chocolate layer before chilling. It adds texture and gives your cups that extra homemade feel that friends and family will adore.
Side Dishes
These cups pair wonderfully with a simple glass of cold milk or a warm cup of coffee or tea. They also make a delightful addition to a brunch spread or party platter where bites of sweetness are always welcome.
Creative Ways to Present
Try arranging these cups on a pretty platter lined with wax paper and add fresh berries around the edges for a burst of color. Wrapping each cup in mini cupcake wrappers or clear cellophane bags tied with a ribbon makes them a charming gift, perfect for sharing.
Make Ahead and Storage
Storing Leftovers
Store your Peanut Butter & Jelly Cups in an airtight container in the refrigerator, where they will stay fresh and delicious for up to one week. Just remember to keep them cool so the chocolate doesn’t soften.
Freezing
If you want to keep these around longer, freezing is an excellent option. Place the cups in a single layer on a baking sheet until frozen solid, then transfer them to a freezer-safe container. They’ll keep well for up to a month without losing texture or flavor.
Reheating
It’s best to enjoy these cold, but if you want to soften them slightly, let them sit at room temperature for 10 to 15 minutes. Avoid microwaving, as this can cause the chocolate shell to lose its crispness and melt unevenly.
FAQs
Can I use natural peanut butter for this recipe?
Absolutely! Natural peanut butter works wonderfully and gives a slightly more authentic, less sweet flavor to the filling. Just make sure to stir it well before mixing so the oils are evenly distributed.
What kind of jelly is best for Peanut Butter & Jelly Cups Recipe?
Any flavor you love will work, but classic choices like strawberry, grape, or raspberry tend to complement the peanut butter beautifully. Feel free to experiment with more exotic jams for a twist.
Is it necessary to use coconut oil when melting chocolate?
No, coconut oil is optional. It just helps make the melted chocolate smoother and easier to spread. If you prefer a thicker shell or don’t have coconut oil on hand, you can skip it.
How long do these cups last at room temperature?
Because of the peanut butter filling and jelly, it’s best to keep these refrigerated. At room temperature, they might soften or spoil within a few hours, especially on warm days.
Can I make these cups gluten-free?
Yes! Simply swap the graham cracker crumbs for gluten-free crumbs or finely chopped gluten-free cookies. The rest of the recipe is naturally gluten-free.
Final Thoughts
This Peanut Butter & Jelly Cups Recipe is such a joy to make and enjoy—it brings together familiar flavors in a new and exciting way that everyone will love. Whether you’re looking for a nostalgic treat or a creative dessert for your next gathering, these cups are a delightful choice to share with your favorite people. I can’t wait for you to try making them and to hear how much you love them!
Print
Peanut Butter & Jelly Cups Recipe
- Prep Time: 15 minutes
- Cook Time: 0 minutes
- Total Time: 45 minutes
- Yield: 12 cups
- Category: Dessert
- Method: No-Cook
- Cuisine: American
Description
Delicious Peanut Butter & Jelly Cups feature a smooth chocolate shell filled with a creamy peanut butter mixture and a sweet jelly layer, making for a nostalgic and delightful treat. These no-bake mini desserts combine rich chocolate, creamy peanut butter, and your favorite jelly for an easy-to-make snack or dessert perfect for any occasion.
Ingredients
Chocolate Shell
- 1 cup semi-sweet chocolate chips (or dark chocolate chips)
- 1 tablespoon coconut oil (optional, for a smoother consistency)
Peanut Butter Filling
- 1 cup creamy peanut butter (natural or regular)
- 1/2 cup powdered sugar
- 1/4 cup graham cracker crumbs
- 1/2 teaspoon vanilla extract
- Pinch of salt
Jelly Layer
- 1/2 cup jelly or jam (strawberry, grape, raspberry, or your favorite flavor)
Instructions
- Melt the Chocolate: In a microwave-safe bowl, combine 1 cup of chocolate chips and 1 tablespoon of coconut oil if using. Microwave in 30-second intervals, stirring in between, until the chocolate is fully melted and smooth.
- Prepare the Muffin Tin: Line a muffin tin with paper liners or silicone cups to prevent sticking and make removal easier.
- Add Chocolate to Liners: Spoon a small amount of melted chocolate into the bottom of each liner. Use a spoon to spread some chocolate up the sides slightly, creating the chocolate shell.
- Chill: Place the muffin tin in the refrigerator for 10-15 minutes to allow the chocolate to set and harden.
- Mix Filling Ingredients: In a medium bowl, combine the peanut butter, powdered sugar, graham cracker crumbs, vanilla extract, and a pinch of salt. Stir until the filling is smooth and well combined.
- Add Peanut Butter Filling: Remove the muffin tin from the refrigerator. Spoon the peanut butter mixture into each chocolate-lined cup, filling them about three-quarters full.
- Add Jelly Layer: Top each peanut butter filling with a small spoonful of jelly or jam, creating a small well or dimple in the center for the jelly.
- Top with Chocolate: Pour the remaining melted chocolate over the jelly layer in each cup, making sure they are fully covered. Gently tap the muffin tin on the counter to settle the chocolate evenly.
- Chill Again: Return the muffin tin to the refrigerator for another 15-20 minutes to allow the chocolate topping to set completely and firm up.
- Remove from Tin: Once fully set, carefully remove the cups from the muffin tin and peel off the liners.
- Enjoy: Serve immediately, or store in an airtight container in the refrigerator for up to one week for best freshness.
Notes
- Use natural peanut butter for a less sweet, more nutty flavor, or regular peanut butter for a sweeter taste.
- Coconut oil is optional but helps the chocolate melt more smoothly and set with a glossy finish.
- For a different texture, try crushing some peanuts to mix into the peanut butter filling.
- You can customize the jelly flavor to your preference or use preserves for a chunkier filling.
- Store the cups in the refrigerator to prevent melting and maintain their shape.
- To make vegan, ensure the chocolate chips and jelly are vegan-friendly, and use a plant-based peanut butter.
