
“`html
If you’re craving a dessert that’s rich, creamy, and totally guilt-free, you’re going to fall head over heels for this No-Bake Keto Cheesecake Recipe. It’s a perfect balance of indulgence and low-carb goodness, blending a buttery almond crust with a luscious, dreamy cream cheese filling. With just a handful of simple ingredients and no oven required, this cheesecake will quickly become your go-to treat for any occasion, whether it’s a cozy night in or an impressive dessert for your next gathering.
Ingredients You’ll Need
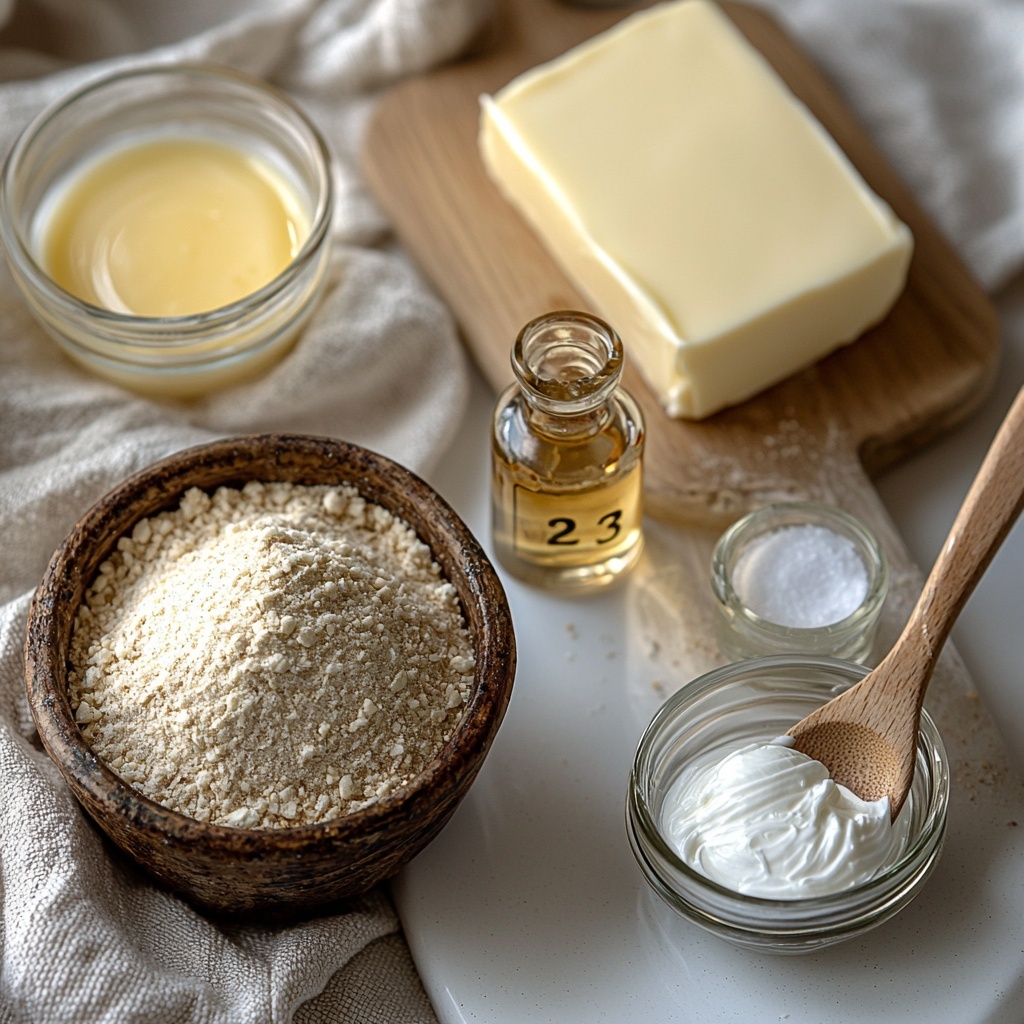
Each ingredient in this No-Bake Keto Cheesecake Recipe plays an essential role, bringing flavor, texture, and creaminess together in perfect harmony. From the nutty almond flour crust to the silky smooth cream cheese filling, these essentials make the recipe both simple and spectacular.
- 1 1/2 cups almond flour: Provides a naturally low-carb, nutty base for the crust that’s crisp and flavorful.
- 1/4 cup butter, melted: Adds richness to the crust and helps it bind perfectly.
- 1 tbsp erythritol: A keto-friendly sweetener that keeps the crust lightly sweet without any carbs.
- 16 oz cream cheese, softened: The star of the filling, delivering that classic cheesecake creaminess.
- 1/2 cup heavy cream: Whipped into the filling, it brings a fluffy, airy texture that feels decadent.
- 1/2 cup erythritol: Sweetens the creamy filling to just the right level without overpowering.
- 1 tsp vanilla extract: Enhances the flavor with warm, aromatic notes that elevate the whole cheesecake.
How to Make No-Bake Keto Cheesecake Recipe
Step 1: Mix and Prepare the Crust
Start by combining the almond flour, melted butter, and 1 tablespoon of erythritol in a mixing bowl. Stir everything together until the mixture is evenly blended and starts to clump, which means it’s ready to become a crust. This step is crucial because it sets the foundation for your cheesecake, making it both firm and flavorful.
Step 2: Press the Crust Into the Dish
Take the almond flour mixture and firmly press it into the bottom of a 9-inch pie dish or cheesecake pan. Press evenly to create a smooth, compact crust layer. Once shaped, pop it into the refrigerator to chill and set while you prepare the filling. This chilling ensures your crust holds together perfectly when serving.
Step 3: Whip the Cream Cheese Filling
In a separate bowl, combine the softened cream cheese, heavy cream, 1/2 cup erythritol, and vanilla extract. Beat the mixture until it becomes completely smooth and creamy. The long whipping introduces just enough air, transforming the filling into a light yet rich texture that melts in your mouth.
Step 4: Assemble the Cheesecake
Pour the luscious cream cheese filling over the chilled almond crust, spreading it evenly with a spatula. Make sure to smooth out the top so your cheesecake looks pristine and inviting. This layer is where all the magic comes together — a silky finish balanced by the nutty crust below.
Step 5: Chill Until Set
Place the assembled cheesecake in the refrigerator for 3 to 4 hours. This resting time is vital to allow the filling to firm up properly without baking, locking in that perfect creamy texture and making it slice beautifully.
Step 6: Slice and Serve
Once set, slice your cheesecake into eight generous servings. Serve it chilled for the best flavor and texture experience. This No-Bake Keto Cheesecake Recipe is delicious on its own or dressed up with your favorite keto-friendly garnishes.
How to Serve No-Bake Keto Cheesecake Recipe
Garnishes
For an elegant touch, top each slice with fresh berries like raspberries or blackberries, which add a pop of color and subtle tartness. Sugar-free whipped cream is another excellent option that complements the richness of the cheesecake without adding carbs. Alternatively, a drizzle of unsweetened cocoa powder or a sprinkle of chopped nuts can add a delightful crunch.
Side Dishes
This cheesecake pairs beautifully with a cup of herbal tea or a freshly brewed espresso, making your dessert moment truly special. If you prefer something lighter, serve it alongside a small green salad with a citrus vinaigrette to cleanse the palate after a rich bite.
Creative Ways to Present
For a party or festive presentation, assemble mini versions in small glass jars layered with berry compote or crushed nuts. You can also create a no-bake cheesecake platter with various garnishes on the side, allowing guests to customize their slices. These options not only look stunning but add fun variety while keeping everything keto-friendly.
Make Ahead and Storage
Storing Leftovers
Store any leftover cheesecake in an airtight container in the refrigerator for up to 3 to 4 days. Keeping it chilled preserves the creamy texture and flavor, making it easy to grab a decadent, keto-friendly dessert anytime during the week.
Freezing
If you want to save portions for later, this cheesecake freezes beautifully. Wrap slices tightly in plastic wrap or place them in a freezer-safe container and freeze for up to one month. To enjoy, thaw overnight in the refrigerator and allow it to come to a creamy consistency before serving.
Reheating
This cheesecake is best enjoyed cold, so reheating isn’t recommended. Simply allow frozen slices to fully thaw in the fridge and serve chilled or at room temperature for the best texture and flavor.
FAQs
Can I use a different sweetener instead of erythritol?
Absolutely! You can substitute erythritol with other keto-friendly sweeteners like monk fruit or stevia blends, adjusting quantities according to sweetness levels. Just keep in mind that some sweeteners may impact texture slightly.
Is it necessary to soften the cream cheese?
Yes, softening the cream cheese is important to ensure a smooth and creamy filling without lumps. Leaving it at room temperature for about 30 minutes before mixing works perfectly.
Can I make this cheesecake without heavy cream?
Heavy cream adds a light and airy texture that balances the richness of the cream cheese, so it’s recommended. If unavailable, you could try substituting with full-fat coconut cream, but the flavor and texture will differ slightly.
How do I prevent the crust from becoming soggy?
Pressing the almond flour crust firmly and chilling it before adding the filling helps it set and stay crisp. Also, ensure no excess moisture is in the filling before pouring it over the crust to avoid sogginess.
Can I add flavors like lemon or chocolate to this recipe?
Definitely! Adding lemon zest or a touch of cocoa powder to the filling can create delicious variations. Just adjust sweeteners accordingly, and consider a small taste test to get the balance right.
Final Thoughts
Making a No-Bake Keto Cheesecake Recipe is one of those simple pleasures that feels like a special treat every single time. It’s easy, satisfying, and fits perfectly into a low-carb lifestyle without sacrificing flavor or decadence. So go ahead, give this recipe a try—you might just discover your new favorite dessert that everyone will rave about!
“`
Print
No-Bake Keto Cheesecake Recipe
- Prep Time: 10 minutes
- Cook Time: 0 minutes
- Total Time: 3 hours 10 minutes
- Yield: 8 servings
- Category: Dessert
- Method: No-Cook
- Cuisine: American
- Diet: Low Carb
Description
This No-Bake Keto Cheesecake is a creamy, low-carb dessert perfect for those following a ketogenic lifestyle. It features a buttery almond flour crust and a smooth, sweetened cream cheese filling that sets in the refrigerator—no baking required. Ready in just over three hours, it’s an easy and delicious treat that satisfies cheesecake cravings while keeping carbs low.
Ingredients
Crust
- 1 1/2 cups almond flour
- 1/4 cup butter, melted
- 1 tbsp erythritol
Filling
- 16 oz cream cheese, softened
- 1/2 cup heavy cream
- 1/2 cup erythritol
- 1 tsp vanilla extract
Instructions
- Prepare the crust: In a mixing bowl, combine the almond flour, melted butter, and 1 tablespoon of erythritol. Stir the mixture thoroughly until all the ingredients are well combined and form a crumbly dough.
- Form the crust: Press the almond flour mixture firmly into the bottom of a 9-inch pie dish or cheesecake pan to create an even crust layer. Place the crust in the refrigerator to chill and set while you prepare the filling.
- Make the filling: In a separate bowl, beat the softened cream cheese, heavy cream, 1/2 cup erythritol, and vanilla extract using an electric mixer until the mixture becomes smooth, creamy, and well incorporated.
- Assemble the cheesecake: Pour the cream cheese filling over the chilled crust, spreading it evenly with a spatula to cover the entire surface.
- Set the cheesecake: Refrigerate the assembled cheesecake for 3 to 4 hours or until it is fully set and firm enough to slice.
- Serve: Once set, slice the cheesecake and serve chilled. Optionally, garnish with fresh berries or sugar-free whipped cream for extra flavor and presentation.
Notes
- Ensure the cream cheese is softened to room temperature for easier mixing and a smoother filling.
- Press the crust mixture firmly to prevent it from crumbling when slicing.
- For added flavor, you can add lemon zest or a pinch of salt to the crust mixture.
- This cheesecake should be stored in the refrigerator and consumed within 3-4 days for optimal freshness.
- Optional toppings include fresh berries, sugar-free whipped cream, or a sprinkle of cocoa powder.

