
If you love a cookie that’s bursting with texture, flavor, and a surprising little crunch in every bite, then you’re going to adore this Kitchen Sink Cookies Recipe. It’s exactly what it sounds like—a fabulously fun medley of chocolate chips, sweet sprinkles, salty pretzels, and even crunchy potato chips all baked into one glorious cookie. Every mouthful is an adventure, and these cookies are perfect for sharing or sneaking a few extra when no one is looking. Trust me, once you try this recipe, it’ll become your go-to for a wildly delicious treat that never disappoints.
Ingredients You’ll Need
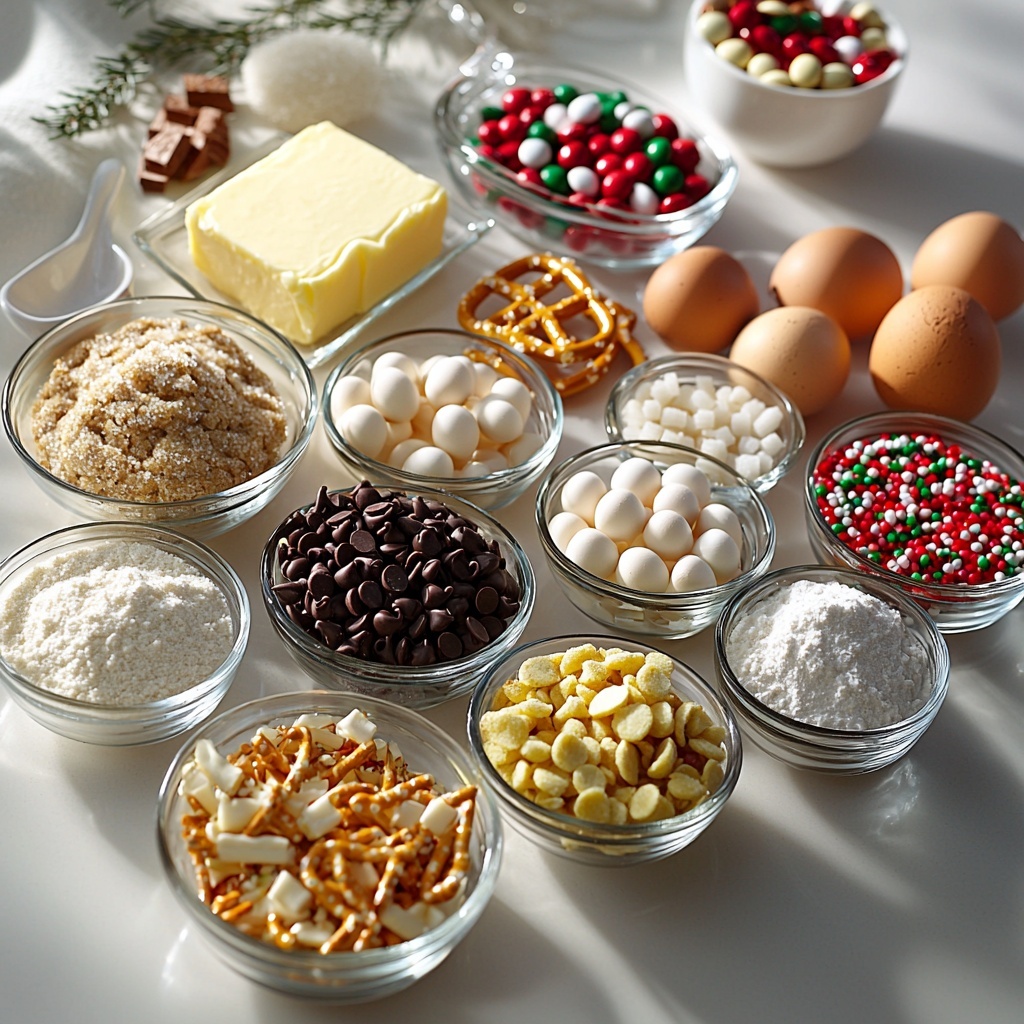
These ingredients come together in a simple, straightforward way, but each component plays a crucial role in creating the perfect balance of sweet, salty, and crunchy textures that make this Kitchen Sink Cookies Recipe so special.
- 1 cup (226 g) unsalted butter, softened: Provides a rich, creamy base and essential moisture for tender cookies.
- 1 cup (200 g) brown sugar, packed: Adds a deep caramel flavor and helps keep the cookies soft.
- 1/2 cup (100 g) granulated sugar: Balances sweetness and contributes to the perfect cookie spread.
- 2 large eggs, room temperature: Give structure and help bind everything together smoothly.
- 2 teaspoons vanilla extract: Adds warm, aromatic depth to the cookie dough.
- 2 1/4 cups (280 g) all-purpose flour: The foundation of the dough, providing structure and the right chewiness.
- 1 teaspoon baking soda: A leavening agent that helps the cookies spread just right.
- 1/2 teaspoon baking powder: Adds extra lift for a lighter cookie texture.
- 1/2 teaspoon salt: Enhances all the flavors and balances the sweetness beautifully.
- 1 cup (170 g) semi-sweet chocolate chips: Classic chocolate pockets that melt into every bite.
- 1/2 cup (85 g) white chocolate chips: Adds a creamy, sweeter contrast to the semi-sweet chips.
- 1/2 cup crushed pretzels: Brings a wonderful salty crunch that surprises the palate.
- 1/2 cup crushed potato chips: Adds an unexpected crispy texture and salty bite.
- 1/2 cup red and green M&Ms: Pops of festive color and sweet chocolate candy pieces.
- 1/4 cup festive holiday sprinkles: Gives the cookies a fun, colorful twist, perfect for the season or any time you want a little extra cheer.
How to Make Kitchen Sink Cookies Recipe
Step 1: Prep Your Oven and Baking Sheets
Start by preheating your oven to 350°F (175°C) and lining two baking sheets with parchment paper. This simple prep step ensures your cookies bake evenly and cleanly, making the whole process smoother and cleanup easier.
Step 2: Cream the Butters and Sugars
In a large mixing bowl, beat together the softened butter, brown sugar, and granulated sugar until the mixture is light and creamy—this usually takes about 2 to 3 minutes. This step is key to a light texture and great flavor base for your cookies.
Step 3: Add Eggs and Vanilla
Beat in the eggs one at a time, mixing well after each addition. Then stir in the vanilla extract. This helps build a smooth, cohesive dough with that classic cookie aroma.
Step 4: Combine Dry Ingredients
In a separate bowl, whisk together the flour, baking soda, baking powder, and salt. This mix ensures your cookies rise perfectly and have that tender bite.
Step 5: Mix Dry Ingredients into Wet
Gradually add the dry ingredients to the wet ingredients, stirring until just combined. Avoid overmixing here to keep your cookies from becoming tough.
Step 6: Fold in the Fun Stuff
Gently fold in the chocolate chips, white chocolate chips, crushed pretzels, potato chips, M&Ms, and festive sprinkles. This is the moment your kitchen sink of goodies really comes together, so take your time and be sure to spread everything evenly.
Step 7: Scoop and Bake
Using a cookie scoop or spoon, drop tablespoon-sized portions of dough onto the prepared baking sheets, spacing them about 2 inches apart. Bake in the preheated oven for 10-12 minutes, until the edges are golden and the centers are set but still soft. Those golden edges signal perfectly baked cookies that are crisp on the outside with a tender, chewy center.
Step 8: Cool and Enjoy
Allow the cookies to cool on the baking sheets for 5 minutes to set, then transfer them to wire racks to cool completely. This rest time helps them finish cooking gently and keeps them from breaking apart when you pick them up.
How to Serve Kitchen Sink Cookies Recipe
Garnishes
Feel free to dust these cookies lightly with flaky sea salt to enhance the sweet and salty contrast, or add a drizzle of melted white or dark chocolate on top for extra decadence. You could even sprinkle a few extra festive sprinkles right before baking for a colorful finish.
Side Dishes
Kitchen Sink Cookies are wonderful on their own, but they also pair beautifully with a cold glass of milk, a scoop of vanilla ice cream, or a hot cup of coffee or tea. These combos make snack time or dessert feel extra special and cozy.
Creative Ways to Present
For parties or holiday gatherings, stack these cookies into a tall tower or arrange them on a festive platter with little signs labeling each fun ingredient. You can also wrap a few individually in cellophane with a ribbon for the perfect edible gift that anyone will appreciate.
Make Ahead and Storage
Storing Leftovers
Once cooled, store your Kitchen Sink Cookies in an airtight container at room temperature. They will stay fresh and chewy for 3 to 4 days, making them a fantastic treat to enjoy over several days without losing their magic.
Freezing
If you want to keep these cookies longer, they freeze beautifully. Place them in a freezer-safe container or bag with parchment paper between layers to prevent sticking. They can be frozen for up to 3 months and still taste just as amazing when thawed.
Reheating
To bring the cookies back to that freshly baked warmth, simply microwave them for about 10 to 15 seconds or pop them in a warm oven (around 300°F) for 3 to 5 minutes. This little warming trick revives the gooey chocolate chips and fresh-baked softness.
FAQs
Can I use salted butter instead of unsalted?
You can, but be sure to reduce the added salt in the recipe slightly since salted butter will add extra saltiness to your cookies.
What makes these cookies “kitchen sink” cookies?
The name comes from the mix of many different ingredients thrown together, as if you are including everything from the kitchen sink. The variety of chips, crushed snacks, and sprinkles creates a delicious and unexpected flavor and texture combo.
Can I substitute any ingredients based on dietary restrictions?
Absolutely! You can swap out dairy butter for plant-based butter, use gluten-free flour blends, or substitute chocolate chips with allergen-friendly options. Just keep the proportions similar for best results.
Why do the cookies have both baking soda and baking powder?
Using both helps create a perfect balance of rise and tenderness, making sure the cookies spread nicely but still hold a chewy, soft texture.
How can I keep the cookies soft for longer?
Store them in an airtight container with a slice of bread—a classic trick that helps maintain moisture and keeps the cookies delightfully soft.
Final Thoughts
This Kitchen Sink Cookies Recipe is truly a celebration of flavors and textures that invites creativity and joy into your baking. It’s one of those recipes you’ll want to make again and again because it never gets old or boring. If you love cookies that surprise and delight with each bite, do yourself a favor and whip up a batch—you’ll be hooked from the first chewy, crunchy taste!
Print
Kitchen Sink Cookies Recipe
- Prep Time: 15 minutes
- Cook Time: 12 minutes
- Total Time: 27 minutes
- Yield: 24 servings
- Category: Dessert
- Method: Baking
- Cuisine: American
Description
These Kitchen Sink Cookies are a delightful mix of sweet, salty, and crunchy ingredients all baked into one irresistible cookie. Packed with semi-sweet and white chocolate chips, crushed pretzels and potato chips, colorful M&Ms, and festive holiday sprinkles, they provide a perfect balance of flavors and textures. Perfect for holiday parties or anytime you want a fun, crowd-pleasing treat.
Ingredients
Wet Ingredients
- 1 cup (226 g) unsalted butter, softened
- 1 cup (200 g) brown sugar, packed
- 1/2 cup (100 g) granulated sugar
- 2 large eggs, room temperature
- 2 teaspoons vanilla extract
Dry Ingredients
- 2 1/4 cups (280 g) all-purpose flour
- 1 teaspoon baking soda
- 1/2 teaspoon baking powder
- 1/2 teaspoon salt
Mix-Ins
- 1 cup (170 g) semi-sweet chocolate chips
- 1/2 cup (85 g) white chocolate chips
- 1/2 cup crushed pretzels
- 1/2 cup crushed potato chips
- 1/2 cup red and green M&Ms
- 1/4 cup festive holiday sprinkles
Instructions
- Preheat and prepare baking sheets: Preheat your oven to 350°F (175°C) and line two baking sheets with parchment paper to prevent sticking and allow for easy cleanup.
- Cream butter and sugars: In a large mixing bowl, beat together the softened butter, brown sugar, and granulated sugar until the mixture is light and creamy, about 2-3 minutes. This helps achieve a tender cookie texture.
- Add eggs and vanilla: Add the eggs one at a time, mixing well after each addition to incorporate fully. Stir in the vanilla extract to enhance the flavor.
- Combine dry ingredients: In a separate bowl, whisk the all-purpose flour, baking soda, baking powder, and salt to evenly distribute the leavening agents and salt.
- Mix dry and wet ingredients: Gradually add the dry mixture to the wet ingredients, stirring until just combined to avoid overworking the dough and creating tough cookies.
- Fold in mix-ins: Gently fold in the semi-sweet chocolate chips, white chocolate chips, crushed pretzels, crushed potato chips, red and green M&Ms, and festive holiday sprinkles. Take care not to overmix so the textures remain distinct.
- Portion onto baking sheets: Using a cookie scoop or spoon, drop tablespoon-sized portions of dough onto the prepared baking sheets, spacing them about 2 inches apart to allow for spreading.
- Bake the cookies: Bake for 10-12 minutes, or until the edges are golden and the centers are set but still soft.
- Cool the cookies: Allow the cookies to cool on the baking sheets for 5 minutes, then transfer them to wire racks to cool completely, which helps them set properly.
Notes
- For best texture, use room temperature eggs and softened butter.
- Do not overmix the dough after adding flour to keep cookies tender.
- Adjust baking time slightly for softer or crisper cookies depending on preference.
- These cookies freeze well—store baked cookies in an airtight container or freeze dough balls for future baking.
- Try swapping in other mix-ins like nuts or different candy pieces for variety.

