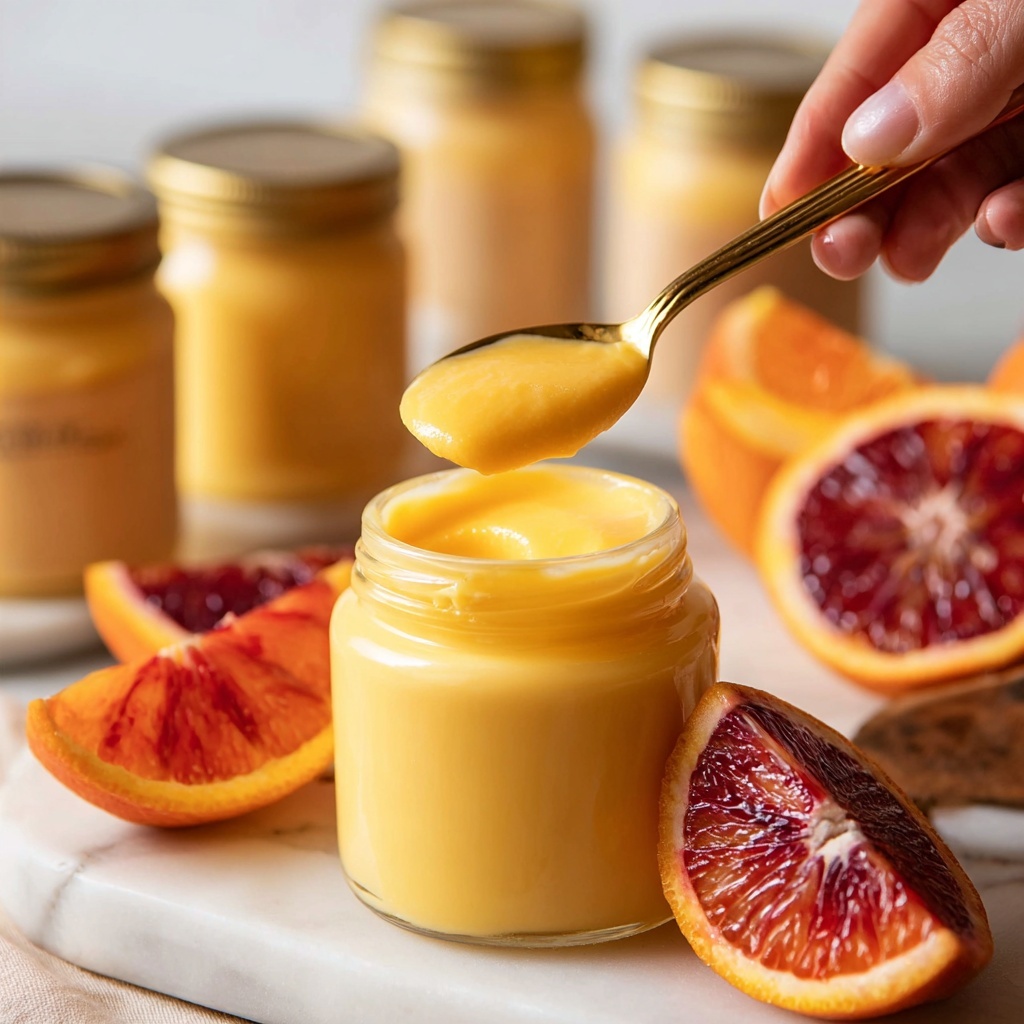
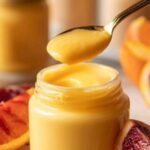
There is something truly magical about a velvety, tangy spread that brightens up your breakfast or dessert, and that’s exactly what this Homemade Eggless Dairy-Free Orange Curd Recipe delivers in spades. Made without any eggs or dairy, it’s wonderfully creamy, bursting with fresh orange flavor, and healthier than traditional curds—all while being incredibly easy to whip up in your own kitchen. If you love vibrant citrus tastes paired with silky textures, I can’t wait for you to dive into this recipe and make it your new favorite zingy treat.
Ingredients You’ll Need
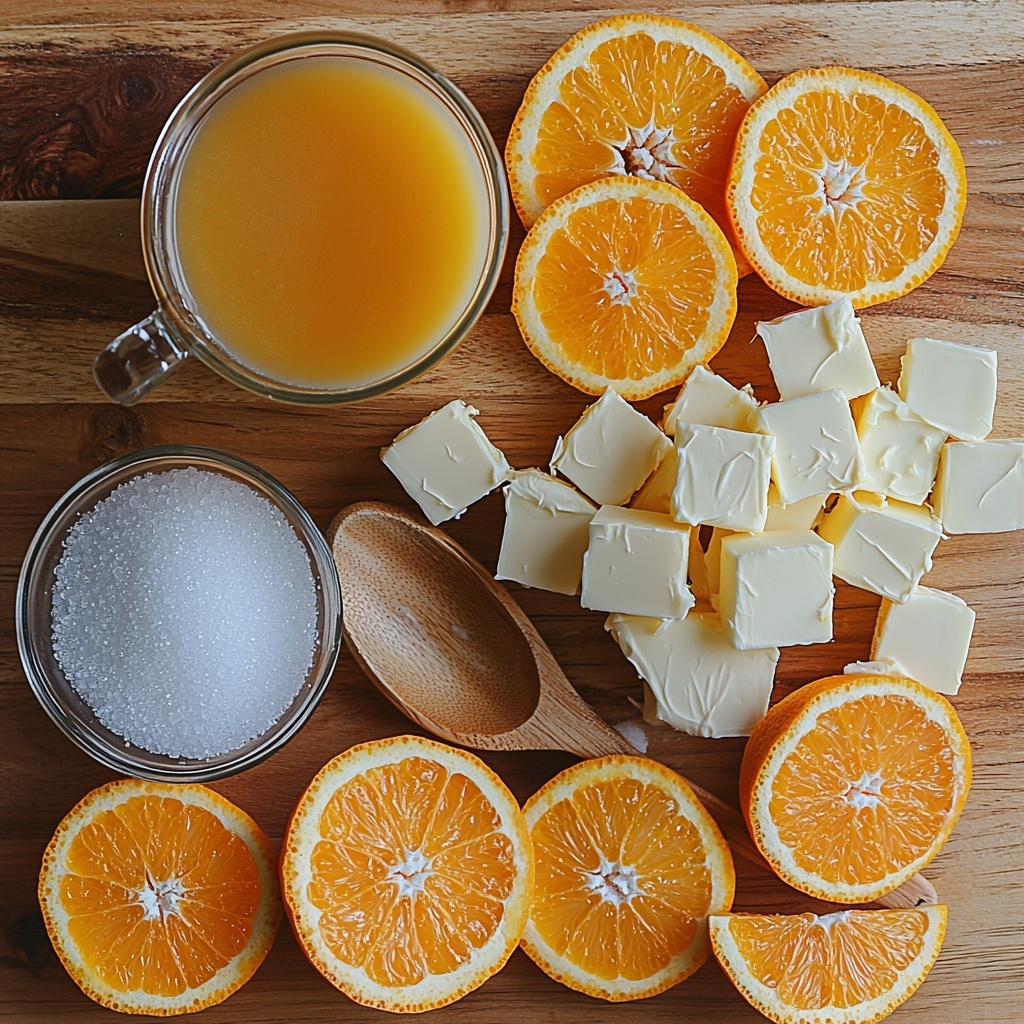
Gathering simple, fresh ingredients is the secret to unlocking the fragrant, luscious nature of this curd. Each component plays an essential role—from the bright, aromatic zest and fresh juice that pack in vibrant flavor, to the non-dairy milk and vegan butter that create a creamy dairy-free base without compromising richness.
- Zest of 3 oranges: This provides intense citrus aroma, so be sure to avoid the bitter white pith for the perfect flavor.
- 360 ml (1 ¼ cups) freshly squeezed orange juice: Freshly squeezed ensures brightness and natural sweetness.
- 150 g (1 cup) cane sugar: Adds just the right level of sweetness to balance the tanginess.
- 120 ml (⅔ cups) non-dairy milk (unsweetened soy, almond, or oat milk): Creates creaminess without dairy, and you can pick your favorite base.
- 50 g (5 tbsp) cornstarch (cornflour): The thickening agent that gives the curd that perfect spoonable texture.
- ¼ teaspoon sea salt: Enhances all the flavors, rounding out the sweetness and acidity.
- 60 g (¼ cup) vegan butter, cold and cubed: Adds richness and a silky finish when incorporated at the end.
How to Make Homemade Eggless Dairy-Free Orange Curd Recipe
Step 1: Clean Your Oranges Thoroughly
Start by making a cleaning solution with water and white vinegar in a 3:1 ratio. Soak your oranges for 10 minutes to remove any residue or wax from the skin. Then, dry them well with a clean towel. This step ensures your zest will be fresh and free from unwanted taste.
Step 2: Zest and Juice the Oranges
Next, carefully zest only the bright outer layer of the oranges, staying clear of the bitter white pith underneath. Once zested, juice the oranges, straining through a fine-mesh sieve to catch seeds and pulp. Using fresh juice is what gives this curd its vibrant, fresh character.
Step 3: Infuse Sugar with Zest
Combine the cane sugar and orange zest in a saucepan. Using your fingertips, rub the zest into the sugar until the grains turn moist and fragrant. This step intensifies the orange aroma and disperses the essential oils evenly, creating a flavor-packed foundation.
Step 4: Mix in Thickening and Liquids
Whisk the cornstarch into the sugared zest, ensuring an even blend without lumps. Then add your freshly squeezed orange juice, non-dairy milk, and sea salt. Whisk again until the mixture is perfectly smooth. This beautiful liquid is on its way to becoming luscious curd.
Step 5: Cook Until Thickened
Set your saucepan over medium heat (or low if cooking with gas) and begin cooking the mixture. Whisk continuously for about 10 minutes until it thickens enough to coat the back of a spatula, showing it’s ready. To avoid any sticking or burning, alternate whisking with a rubber spatula, making sure the heat is gentle and even.
Step 6: Strain and Enrich with Vegan Butter
Place your cold vegan butter cubes in a large bowl and set a fine-mesh sieve over it. Pour the hot curd through the sieve, pressing gently with a spatula to help it pass. Whisk the curd and butter together until the texture turns silky smooth and glossy. This final enrichment brings creaminess into the dairy-free curd.
Step 7: Cool and Store
Cover the surface of the curd tightly with plastic wrap to prevent a skin from forming. Let it cool slightly at room temperature for 10 to 15 minutes before transferring into an airtight container. Refrigerate to allow the flavors to meld and the curd to set further.
Step 8: Ready to Enjoy
Your homemade eggless dairy-free orange curd will keep well in the fridge for up to a week. If you are using it on the same day, it can stay at room temperature in a sealed jar. Should it firm up too much, gently warming it over a double boiler will bring it back to the perfect spreading consistency.
How to Serve Homemade Eggless Dairy-Free Orange Curd Recipe
Garnishes
Simple garnishes make your orange curd look as stunning as it tastes. Fresh mint leaves add a pop of green and refreshing aroma, while thin orange slices provide visual appeal and enhance the citrus theme. Consider a light dusting of powdered sugar for sweetness and elegance if serving with desserts.
Side Dishes
This curd is fantastic with a variety of sides! Spread it over warm toast or flaky croissants for breakfast bliss, dollop it on coconut yogurt or dairy-free ice cream for a tangy twist, or swirl it into oatmeal or chia pudding for a burst of sunshiney flavor. It also pairs beautifully with scones and pancakes to elevate your brunch experience.
Creative Ways to Present
Try layering this curd in parfaits with granola and fresh berries for a colorful, textural treat that wows. Use it as a filling for dairy-free tarts or cakes, or simply serve it alongside vegan cheesecakes to cut through the richness with bright citrus note. The possibilities are endless and so delicious!
Make Ahead and Storage
Storing Leftovers
Keep your leftover orange curd in an airtight container in the refrigerator for up to one week. Proper sealing helps maintain freshness and prevents the delicate citrus flavors from fading or picking up other fridge odors.
Freezing
You can freeze the curd in a suitable container for up to 2 months. When ready to use, thaw it overnight in the fridge and whisk gently to restore its creamy consistency. Keep in mind the texture may be slightly altered but the flavor remains vibrant.
Reheating
To soften chilled curd before serving, place it in a heatproof bowl over a pot of simmering water (a double boiler method). Warm gently while stirring until it loosens to your desired texture without overheating or curdling.
FAQs
Can I use any citrus other than oranges?
Absolutely! While this recipe highlights oranges for their sweet and tangy balance, lemons, limes, or even grapefruit can be fantastic substitutes. Just adjust the sugar slightly depending on the tartness, and remember zest and juice are key to that fresh flavor.
Is cornstarch the only thickener I can use?
Cornstarch works best for a smooth, glossy curd, but arrowroot powder or tapioca starch can be good alternatives if you prefer. Just keep an eye on the cooking time and texture as these thickeners behave a bit differently.
Why do I need vegan butter in the recipe?
The vegan butter adds richness and silkiness, mimicking the texture that dairy butter gives in traditional curd. It also helps mellow the acidity while improving mouthfeel, making the curd more luscious.
Can I make this recipe without any oil or butter?
While you can omit the vegan butter, expect the texture to be less rich and creamy. The curd will still taste wonderful, but the finish won’t be quite as silky or indulgent.
How long does this orange curd keep at room temperature?
If you plan to consume it on the same day, it can stay at room temperature in a sealed jar safely for several hours, ideally not more than 6-8 hours. For longer storage, refrigeration is always best to preserve freshness.
Final Thoughts
I genuinely hope you give this Homemade Eggless Dairy-Free Orange Curd Recipe a try—it’s one of those cherished kitchen treasures that brings bright sunshine to any meal. The blend of creamy texture, vibrant citrus flavor, and ease of preparation makes it perfect for both beginners and seasoned cooks alike. Spread it, spoon it, or swirl it into your favorite dishes and watch as it becomes a delightful staple in your home. Happy cooking and orange curd loving!
Print
Homemade Eggless Dairy-Free Orange Curd Recipe
- Prep Time: 15 minutes
- Cook Time: 10 minutes
- Total Time: 25 minutes
- Yield: Approximately 1 ½ cups
- Category: Condiment
- Method: Stovetop
- Cuisine: Western
- Diet: Vegan
Description
This Homemade Eggless Dairy-Free Orange Curd is a vibrant, zesty spread perfect for those seeking a creamy, tangy condiment without eggs or dairy. Made with fresh orange juice, vegan butter, and non-dairy milk, it offers a luscious texture and bright citrus flavor, ideal for spreading on toast, layering in cakes, or dolloping onto desserts.
Ingredients
Preparation
- Zest of 3 oranges
- 360 ml (1 ¼ cups) freshly squeezed orange juice
Wet Ingredients
- 120 ml (⅔ cups) non-dairy milk (unsweetened soy, almond, or oat milk)
- 60 g (¼ cup) vegan butter, cold and cubed
Dry Ingredients
- 150 g (1 cup) cane sugar
- 50 g (5 tbsp) cornstarch (cornflour)
- ¼ teaspoon sea salt
Instructions
- Clean the Oranges: In a large bowl, mix water and white vinegar in a 3:1 ratio. Soak the oranges in this solution for 10 minutes to clean them thoroughly, then dry them well.
- Zest and Juice the Oranges: Carefully zest only the bright outer layer of the oranges avoiding the bitter white pith. Juice the oranges and strain the juice through a fine-mesh sieve to remove seeds.
- Infuse Sugar with Zest: Combine the sugar and orange zest in a saucepan. Use your fingertips to rub the zest into the sugar until the sugar grains feel moist and fragrant.
- Mix Dry and Wet Ingredients: Add the cornstarch to the sugar mixture and whisk to combine evenly. Pour in the fresh orange juice, non-dairy milk, and sea salt, whisking until smooth.
- Cook the Curd: Place the saucepan on medium heat (or low if using a gas stove). Cook and whisk the mixture continuously for about 10 minutes until it thickens enough to coat the back of a spatula without running off. Alternate between a rubber spatula and whisk to prevent sticking and ensure even cooking.
- Strain and Incorporate Vegan Butter: Place the cold vegan butter in a large bowl and set a fine-mesh sieve over it. Pour the hot curd through the sieve, pressing with a spatula to help it pass through, then whisk it into the butter until silky smooth.
- Prevent Skin Formation: Cover the surface of the curd with plastic wrap to prevent skin formation. Let it cool slightly at room temperature for 10-15 minutes, then transfer it to an airtight container and refrigerate.
- Store Properly: Store the curd in the refrigerator for up to 1 week. If using the same day, it can be kept at room temperature in a sealed jar. To loosen consistency, gently warm over a double boiler before serving.
Notes
- Use only the bright orange zest, as the white pith can impart bitterness.
- Continuous whisking during cooking is essential to prevent lumps and sticking.
- The curd thickens more as it cools; adjust cooking time if needed for desired consistency.
- The recipe is naturally vegan and dairy-free, making it suitable for vegan and lactose-intolerant diets.
- Store in an airtight container to maintain freshness and prevent skin formation.
- Gently warming the curd before use helps restore spreadability if it has thickened too much in the fridge.
