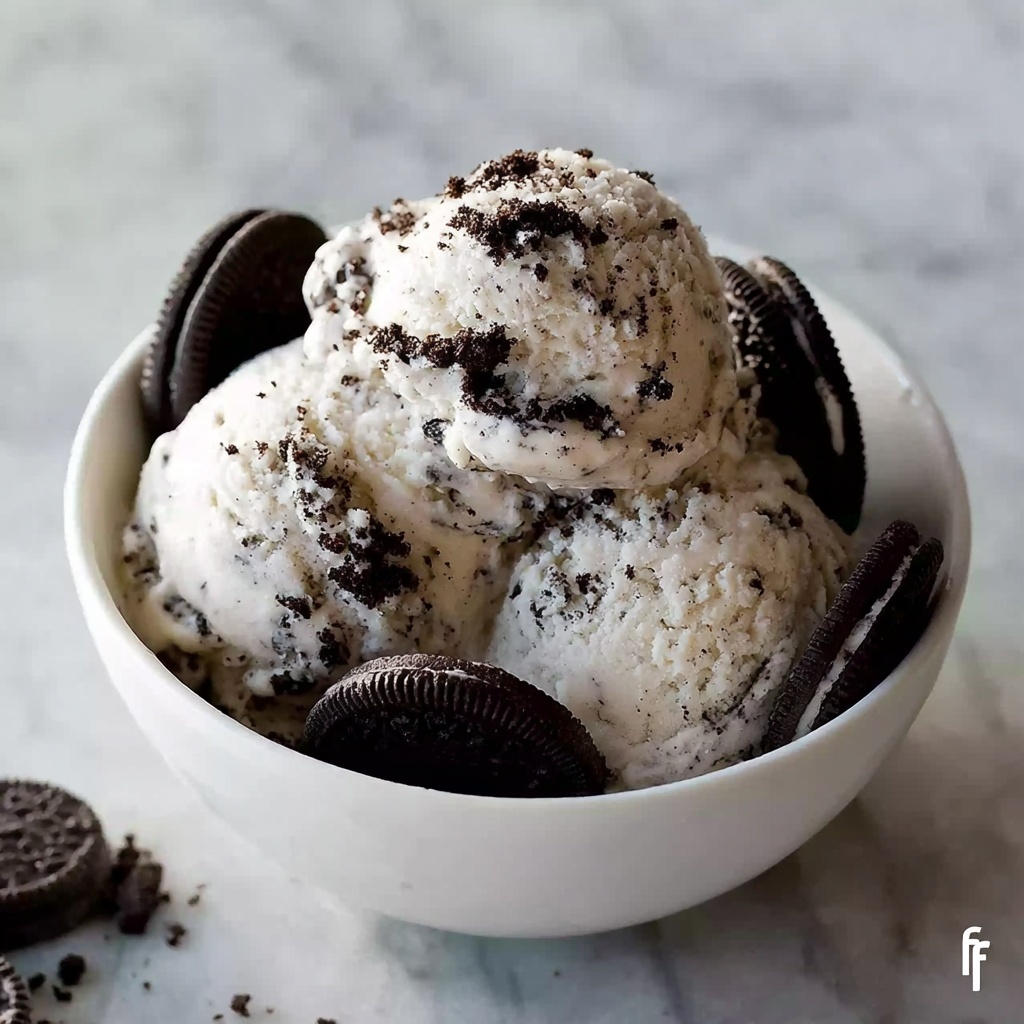
If you’ve ever dreamed of making your own ice cream at home without tripping over complicated machines or endless waiting, this Cookies and Cream Ice Cream (No Machine Required) Recipe is about to become your new best friend. Imagine a luscious, creamy treat packed with crunchy chocolate cookie pieces, delivering that nostalgic flavor of classic Cookies and Cream in a smooth, dreamy scoop. This recipe is incredibly simple, yet so satisfying, perfect for impressing family and friends or indulging on a sunny afternoon without any fuss.
Ingredients You’ll Need
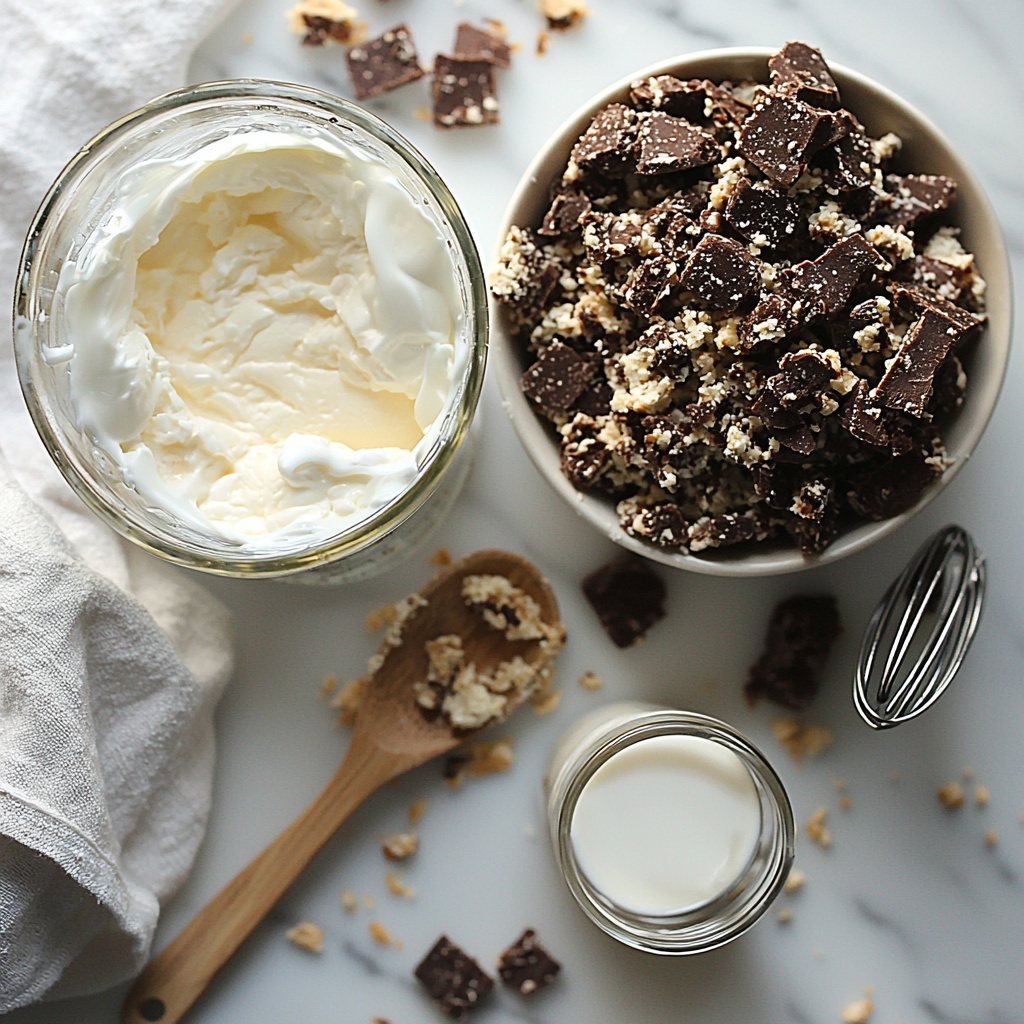
This recipe shines because its ingredients are few, straightforward, and each plays a crucial role in creating that perfect texture and flavor. From the velvety cream to the sweet condensed milk, and of course, the chocolate sandwich cookies that bring in the iconic crunch, every component is essential.
- 2 cups cold heavy whipping cream: The star for achieving the rich, creamy base that whips up beautifully and holds air for lightness.
- 1 (14 oz) can sweetened condensed milk: Adds sweetness and a silky texture without needing granulated sugar or extra effort.
- 1 teaspoon pure vanilla extract: Enhances the overall flavor with a warm, comforting note.
- 18–24 chocolate sandwich cookies (like Oreos), roughly chopped: Provides the trademark crunch and chocolatey goodness that makes this ice cream so addictive.
How to Make Cookies and Cream Ice Cream (No Machine Required) Recipe
Step 1: Whip the Cream
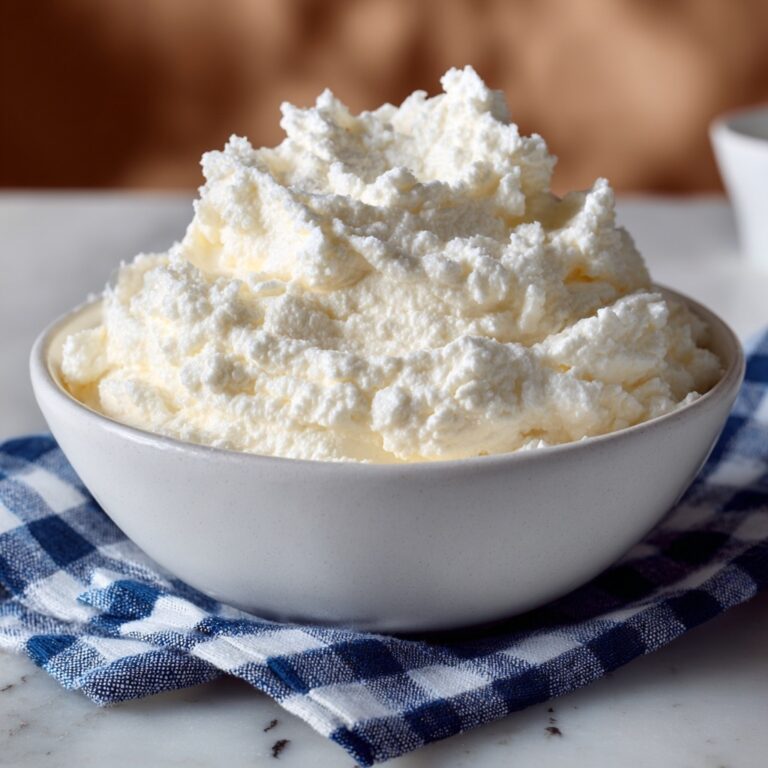
Start with very cold heavy cream placed in a large, chilled bowl. Beat the cream using a hand mixer or stand mixer on medium-high speed until it forms stiff peaks. This usually takes about 3 to 4 minutes. You’ll know it’s ready when the cream holds its shape firmly and looks fluffy and airy. The whipped cream is the secret behind the luxurious, soft texture of this no-churn ice cream.
Step 2: Make the Base
In a separate bowl, combine the sweetened condensed milk with the vanilla extract. This simple mixture brings the perfect balance of smooth sweetness and fragrant warmth, setting the stage for the cookies and cream magic.
Step 3: Fold Gently
Carefully fold the whipped cream into the condensed milk and vanilla mixture with a spatula. Take your time and fold slowly; the goal is to keep as much air as possible to maintain an airy and light ice cream base. This careful folding is vital for that scoopable, creamy texture you’ll love.
Step 4: Add Cookies
Now it’s time for the star ingredient! Fold in the roughly chopped chocolate sandwich cookies. For that perfect mix of texture, leave some cookie pieces larger for delightful crunches, while others can be crushed finer to infuse tiny bursts of chocolate throughout. It’s these chocolate cookie chunks that truly bring the “cookies and cream” experience alive.
Step 5: Freeze
Transfer the mixture into a loaf pan or any freezer-safe container. Smooth out the top, and if you want a little extra cookie appeal, sprinkle some cookie crumbs on top. Cover tightly with plastic wrap or a lid, then pop it in the freezer for at least 6 hours or overnight. When it’s frozen solid, you’ll have a creamy, homemade treat that tastes just like premium ice cream without any special equipment.
How to Serve Cookies and Cream Ice Cream (No Machine Required) Recipe
Garnishes
To elevate your ice cream experience, consider topping your scoops with a drizzle of hot fudge or chocolate syrup, a few extra cookie crumbles for crunch, or even a dollop of lightly whipped cream. Fresh berries or a sprinkle of sea salt can also add surprising bursts of flavor that complement the sweetness beautifully.
Side Dishes
This ice cream pairs wonderfully with warm desserts. Think fudgy brownies, gooey chocolate chip cookies, or a classic apple pie. The contrast between warm, soft desserts and the cold, creamy ice cream is an absolute showstopper that everyone will adore.
Creative Ways to Present
Why not turn your Cookies and Cream Ice Cream (No Machine Required) Recipe into a playful parfait layered with chocolate sauce and crushed cookies, or use it as a filling between two soft chocolate wafers to create homemade ice cream sandwiches? You can also serve scoops in hollowed-out chocolate cups for an impressively fun presentation that looks as good as it tastes.
Make Ahead and Storage
Storing Leftovers
Keep your ice cream covered tightly to prevent ice crystals and freezer burn. An airtight container or well-sealed plastic wrap is your best friend here. Stored properly, your homemade Cookies and Cream Ice Cream (No Machine Required) Recipe will stay fresh and delicious for up to two weeks.
Freezing
This recipe is designed to be frozen solid to get that scoopable consistency, so freezing is essential. Make sure the container you use is freezer-safe and tightly covered to keep flavors pure and texture perfect. Avoid frequent thawing and refreezing, which can create ice crystals and degrade the creamy texture.
Reheating
Ice cream doesn’t really need reheating, but if you find it’s too hard right out of the freezer, just let it sit at room temperature for 5 minutes before scooping. This brief rest period softens it just enough for effortless scooping without melting it entirely.
FAQs
Can I use a different type of cookie for the Cookies and Cream Ice Cream (No Machine Required) Recipe?
Absolutely! While classic chocolate sandwich cookies are traditional, any crunchy chocolate cookie or even chocolate chip cookies can add interesting texture and flavor. Just make sure they hold up well when frozen.
Do I have to use heavy whipping cream?
Heavy whipping cream is key because it whips into stiff peaks and gives the ice cream its creamy body. Using a lighter cream or milk won’t hold air and will result in a less creamy texture.
How long does it take to make this recipe from start to finish?
The actual prep time is quite short—around 15 minutes to mix everything. However, freezing time is about 6 hours to overnight, so plan accordingly for the best results.
Can I add mix-ins other than cookies?
Yes! This recipe is versatile. Consider adding mini chocolate chips, crushed nuts, or swirls of caramel or fudge before freezing for a personalized twist on the classic cookies and cream flavor.
Is this recipe suitable for beginners?
Definitely. Since this is a no-churn recipe requiring no special equipment, it’s perfect for anyone looking to make homemade ice cream with minimal effort and maximum deliciousness.
Final Thoughts
You simply can’t go wrong with this Cookies and Cream Ice Cream (No Machine Required) Recipe. It’s creamy, crunchy, and insanely easy to whip up whenever the craving strikes. I encourage you to give it a try and enjoy the delicious satisfaction of crafting your own ice cream masterpiece at home. Trust me, once you do, store-bought just won’t compare anymore!
Print
Cookies and Cream Ice Cream (No Machine Required) Recipe
- Prep Time: 10 minutes
- Cook Time: 0 minutes
- Total Time: 6 hours 10 minutes
- Yield: About 1.5 quarts (6-8 servings)
- Category: Dessert
- Method: No-Cook
- Cuisine: American
Description
This no-churn Cookies and Cream Ice Cream is a creamy and indulgent treat packed with crunchy chocolate cookie pieces. Made without an ice cream machine, it combines whipped heavy cream and sweetened condensed milk for a rich, smooth texture that rivals premium store-bought ice cream. Easy to prepare and perfect for satisfying your sweet tooth with the classic cookies and cream flavor.
Ingredients
Ice Cream Base
- 2 cups cold heavy whipping cream
- 1 (14 oz) can sweetened condensed milk
- 1 teaspoon pure vanilla extract
Mix-ins
- 18–24 chocolate sandwich cookies (like Oreos), roughly chopped
Instructions
- Whip the Cream: In a large chilled bowl, beat the cold heavy cream using a hand or stand mixer on medium-high speed until stiff peaks form, about 3–4 minutes. The whipped cream should hold its shape firmly to ensure a creamy texture.
- Make the Base: In a separate bowl, stir together the sweetened condensed milk and pure vanilla extract until well combined, creating a sweet, flavorful ice cream base.
- Fold Gently: Using a spatula, gently fold the whipped cream into the condensed milk mixture. Fold slowly and carefully to retain the airiness and light texture of the whipped cream.
- Add Cookies: Fold in the roughly chopped chocolate sandwich cookies, leaving a mix of larger chunks and finer crumbs for the perfect cookies and cream consistency.
- Freeze: Pour the mixture into a loaf pan or any freezer-safe container. Smooth the top and optionally sprinkle extra cookie crumbs on top. Cover tightly with plastic wrap or a lid. Freeze for at least 6 hours or overnight until firm.
- Serving Tip: Before serving, let the ice cream sit at room temperature for about 5 minutes to soften slightly, ensuring a creamy and scoopable texture.
Notes
- Use very cold heavy cream for better whipping and creaminess.
- Do not overmix when folding; maintain the light, airy texture by folding gently.
- Add 1 tablespoon of vodka to the base to achieve a softer, scoopable ice cream texture.
- For a variation, swirl in hot fudge before freezing for a cookies & cream fudge version.


