
If you’re on the hunt for a delightful, crispy treat that feels like a warm hug from Italy, this Classic Pizzelle Cookies Recipe is your new best friend. These beautiful lace-like cookies, traditionally flavored with vanilla or anise, bring a light, fragrant crunch to your kitchen that’s simply irresistible. Perfect for holidays or any time you want to impress guests with something special yet easy, these pizzelles are just as fun to make as they are to eat. Let’s dive into the magic of crafting this charming Italian classic together!
Ingredients You’ll Need
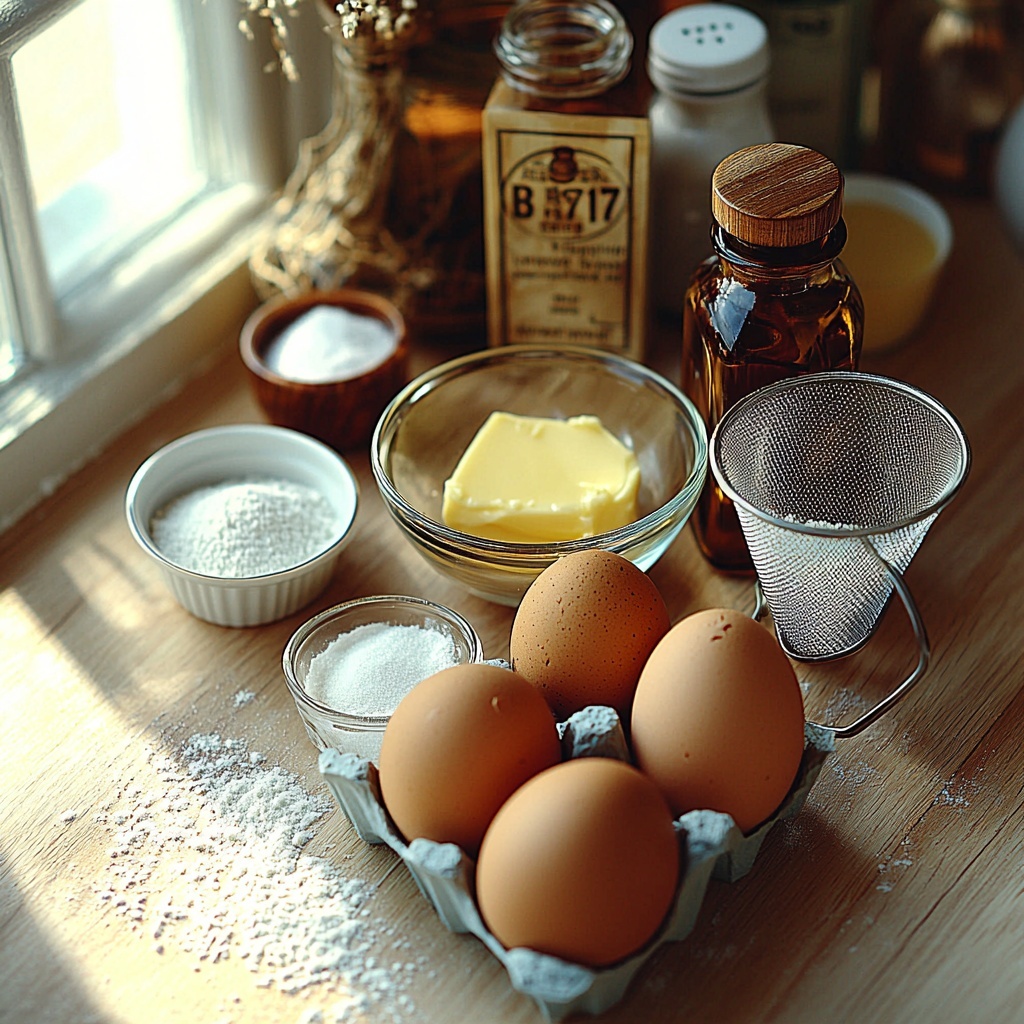
These ingredients are wonderfully simple, but they each play a crucial role in achieving that perfect pizzelle texture and flavor. From eggs providing structure to melted butter adding richness, every element brings the cookie to life with a delicate balance of taste and crunch.
- 3 large eggs: The backbone of the batter, offering both moisture and structure.
- 3/4 cup sugar: Adds just the right amount of sweetness without overpowering the subtle flavors.
- 1/2 cup unsalted butter, melted: Gives a lovely richness and tender crumb to the cookies.
- 1 1/2 tsp vanilla extract (or 1 tsp anise extract): Classic flavor choices that define the pizzelle’s fragrant soul.
- 1 3/4 cups all-purpose flour: The base that holds everything together and forms the crisp exterior.
- 2 tsp baking powder: Helps the cookies rise lightly and stay airy.
- 1/2 tsp salt: Enhances all the sweet and fragrant notes brilliantly.
- 1/4 cup powdered sugar (optional): For a delicate dusting that adds an elegant touch before serving.
How to Make Classic Pizzelle Cookies Recipe
Step 1: Preheat Your Pizzelle Iron
First things first, get your pizzelle iron nice and warm following the manufacturer’s instructions. A well-heated iron ensures those signature crisp and beautiful lace patterns, so don’t rush this part! Lightly grease it if needed to make sure your cookies release easily.
Step 2: Prepare the Batter
In a large bowl, beat the eggs and sugar together until the mixture is smooth and frothy—this is key to achieving a light texture. Then, whisk in the melted butter and your choice of vanilla or anise extract, blending everything into a harmonious, fragrant batter ready for the dry ingredients.
Step 3: Combine the Dry Ingredients
In a separate bowl, whisk together the flour, baking powder, and salt. Gradually add this dry mixture to the wet mixture, stirring gently until just combined. The batter will be thick and hold its shape well, so resist the urge to overmix—this keeps your pizzelle tender and crisp.
Step 4: Cook the Pizzelles
Spoon a heaping tablespoon of batter onto the center of your preheated pizzelle iron (the amount may vary depending on your iron’s size). Close the lid and cook for 30 seconds to 1 minute, depending on your preferred crispiness. Watch for a lovely golden-brown color that signals they’re done—and irresistibly ready.
Step 5: Cool and Serve
Gently remove the pizzelles and lay them on a wire rack to cool. This lets them crisp up perfectly while maintaining that delicate, airy texture. If you want to add a touch of elegance, dust them with powdered sugar just before serving.
How to Serve Classic Pizzelle Cookies Recipe
Garnishes
A light dusting of powdered sugar is a classic way to enhance these cookies’ charm without overwhelming their delicate flavors. You can also sprinkle a pinch of cinnamon or drizzle a bit of melted chocolate for a creative twist that will wow your guests.
Side Dishes
Classic pizzelle cookies pair beautifully with coffee, espresso, or a cozy cup of tea. Their crisp texture balances the warmth of your beverage perfectly, making them an ideal afternoon treat or dessert accompaniment.
Creative Ways to Present
Try shaping pizzelles into cones while they’re still warm to make charming ice cream cones that add fun and flair to any dessert. Or sandwich two pizzelles together with gelato or whipped cream for a playful and indulgent treat that’s sure to delight kids and adults alike.
Make Ahead and Storage
Storing Leftovers
Once completely cooled, store your pizzelle cookies in an airtight container at room temperature. They keep their crispness and fresh flavor beautifully for up to 7 days, making them a perfect make-ahead treat for holiday gatherings or last-minute company.
Freezing
If you want to enjoy these tasty pizzelles longer, freezing is a great option. Place them in an airtight container or freezer bag, separating layers with parchment paper to prevent sticking. They freeze well for several months without losing their crisp texture or lovely flavor.
Reheating
To bring back that fresh-out-of-the-iron crispness, pop the frozen pizzelles into a preheated oven at 300°F (150°C) for a few minutes. Keep an eye on them so they don’t burn—when warm and crisp, they’re ready to enjoy as if freshly baked.
FAQs
Do I need a special iron to make Classic Pizzelle Cookies Recipe?
Yes, a pizzelle iron is specifically designed for making these cookies with their signature lace pattern and thin crisp texture. While you could try a waffle iron, the results won’t be quite the same, so investing in a pizzelle iron is well worth it if you love these cookies.
Can I use different flavors besides vanilla and anise?
Absolutely! Almond and lemon extracts work wonderfully to give your pizzelles a unique twist. Just substitute the vanilla or anise extract with your preferred flavor for a fun variation that keeps the spirit of the Classic Pizzelle Cookies Recipe.
How do I get pizzelles to be softer instead of crunchy?
If you prefer a softer pizzelle, take them off the iron a little earlier before they turn golden brown. They will set as they cool, so timing is everything to get the texture just right for your taste.
Can I make pizzelles dairy-free?
Yes, you can swap the unsalted butter for a dairy-free alternative like coconut oil or a plant-based margarine. The flavor will be slightly different, but you’ll still enjoy that delightful pizzelle crunch and aroma.
What’s the best way to store pizzelles for keeping them fresh?
Store pizzelle cookies in an airtight container at room temperature to preserve their crisp texture. Avoid storing them in the fridge, which can cause them to become stale faster. They’ll stay fresh and delicious for up to 7 days this way.
Final Thoughts
Making the Classic Pizzelle Cookies Recipe is one of those joyful kitchen adventures that yields delicious, beautiful results every time. Crisp, fragrant, and absolutely charming, these cookies bring a touch of Italian tradition and warmth to any table. Whether you’re sharing with friends over coffee or shaping them into cones for a fun dessert, pizzelles are sure to become a treasured favorite. So grab your pizzelle iron and start baking—your taste buds will thank you!
Print
Classic Pizzelle Cookies Recipe
- Prep Time: 15 minutes
- Cook Time: 15 minutes
- Total Time: 30 minutes
- Yield: About 24 pizzelle cookies
- Category: Dessert
- Method: Baking
- Cuisine: Italian
- Diet: Vegetarian
Description
Pizzelle Cookies are traditional Italian waffle cookies known for their delicate, crispy texture and delightful vanilla or anise flavor. Made using a pizzelle iron, these cookies feature a beautiful lace-like pattern and are perfect for festive occasions or any time you crave a light, sweet treat.
Ingredients
Main Ingredients
- 3 large eggs
- 3/4 cup sugar
- 1/2 cup unsalted butter, melted
- 1 1/2 tsp vanilla extract (or 1 tsp anise extract for traditional flavor)
- 1 3/4 cups all-purpose flour
- 2 tsp baking powder
- 1/2 tsp salt
- 1/4 cup powdered sugar (optional, for dusting)
Instructions
- Preheat the pizzelle iron: Preheat your pizzelle iron according to the manufacturer’s instructions. If your iron is not non-stick, lightly grease it to prevent sticking.
- Prepare the batter: In a large bowl, beat the eggs and sugar together until the mixture is smooth and slightly frothy. Add the melted butter and vanilla or anise extract, whisking well to combine.
- Combine the dry ingredients: In a separate bowl, whisk together the all-purpose flour, baking powder, and salt. Gradually add this dry mixture to the wet ingredients, stirring just until combined. The batter should be thick but not overly sticky.
- Cook the pizzelles: Spoon a heaping tablespoon of batter onto the center of the preheated pizzelle iron. Close the lid and cook for approximately 30 seconds to 1 minute, depending on your iron and desired crispness. The pizzelles should turn golden brown.
- Cool and serve: Carefully remove the pizzelle cookies from the iron and place them on a wire rack to cool completely. Once cooled, dust with powdered sugar if desired before serving.
Notes
- Flavor variations: Try almond or lemon extract for different taste profiles.
- Adjust texture by shortening or extending cook time to achieve softer or crisper cookies.
- Store pizzelle cookies in an airtight container for up to one week or freeze for longer preservation.
- Shape warm pizzelles into cones for creative presentations like ice cream cones.
- Optional chocolate variation: Add 1/4 cup unsweetened cocoa powder to the dry ingredients for chocolate pizzelles.
- Optional citrus variation: Add zest from 1 lemon or orange into the batter for a fresh twist.

