“`html
If you’re looking for a delightful, colorful treat that’s as easy to make as it is fun to eat, then you absolutely have to try the Fruity No-Bake Cookies: Quick, Fun Treat for Everyone! Recipe. These vibrant little bites pack a flavorful punch with the crunch of Fruity Pebbles, the creamy sweetness of white candy coating, and that little zing from lemon extract. Whether you’re craving a nostalgic snack or want something quick to whip up for a crowd, this recipe hits all the right notes with a perfect balance of texture, taste, and charm.
Ingredients You’ll Need
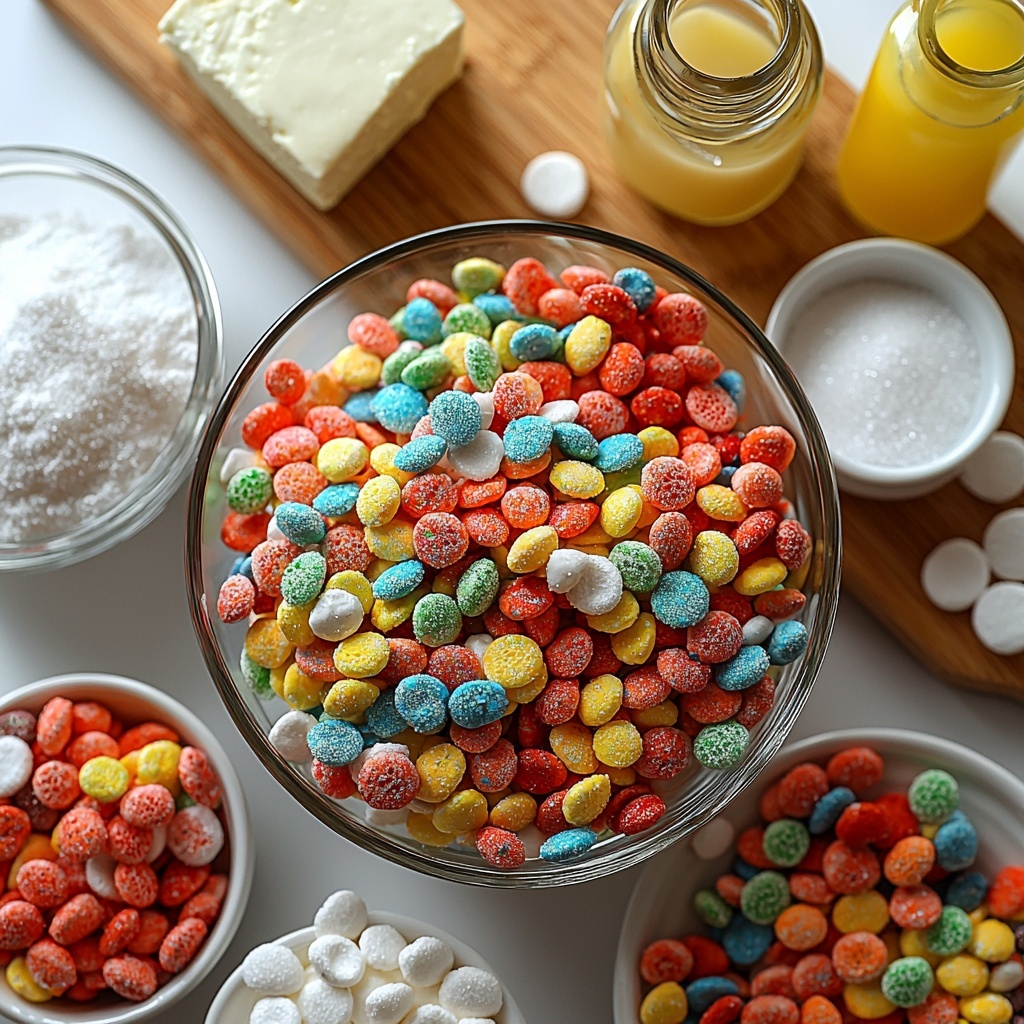
Getting started with this recipe is a breeze because the ingredients are simple yet play crucial roles in making these cookies irresistible. Each component adds a unique texture or flavor, turning straightforward pantry staples into a show-stopping treat.
- 3 cups Fruity Pebbles cereal: Adds a colorful crunch that makes every bite exciting and nostalgic; feel free to substitute with any other colorful cereal you love.
- 8 oz Cream cheese: Keep it softened for easier mixing and to add creamy richness that binds the cereal perfectly.
- 1/2 cup Sugar: Sweetens the mix just right; you can reduce this if you prefer less sweetness.
- 1 cup White candy coating: Melts into a smooth shell for dipping, and you can swap for semi-sweet chocolate if you want a richer flavor.
- 2 tbsp Shortening: Helps melt and thin the candy coating for perfect dipping; coconut oil works as a flavorful alternative.
- 1 tsp Lemon extract: Adds a bright, fresh note to balance the sweetness; vanilla extract works just as well if lemon isn’t available.
- 1 cup Sprinkles: Completely optional, but these rainbow delights add extra festivity and texture to your cookies.
How to Make Fruity No-Bake Cookies: Quick, Fun Treat for Everyone! Recipe
Step 1: Crush the Cereal
Start by pouring the Fruity Pebbles cereal into a food processor and pulse until it reaches a fine, crumbly texture. This crushes the cereal just enough to make it easier to bind in the mixture without losing that iconic fruity crunch.
Step 2: Mix Cream Cheese and Sugar
In a mixing bowl, combine the softened cream cheese with the sugar, blending until smooth and creamy. This mixture acts as the sticky base that holds everything together while lending a mildly tangy sweetness.
Step 3: Combine Cereal with Cream Cheese Mixture
Gently fold the crushed cereal into the cream cheese blend, stirring until every crumb is coated. The goal here is uniform coverage so your cookies have consistent texture and flavor.
Step 4: Shape the Cookies
Using your hands, scoop out portions of the mixture and roll into 1-inch balls. Then, press each ball down until about 1/4-inch thick to form cookie shapes that will be easy to dip and decorate.
Step 5: Chill the Cookies
Place your shaped cookies on a baking sheet and pop them into the freezer for 30 minutes. This step firms them up, making the dipping process neat and less messy.
Step 6: Prepare the Candy Coating
In a microwave-safe bowl, melt the white candy coating along with the shortening. Stir until silky smooth and easy to dip your cookies into.
Step 7: Dip and Decorate
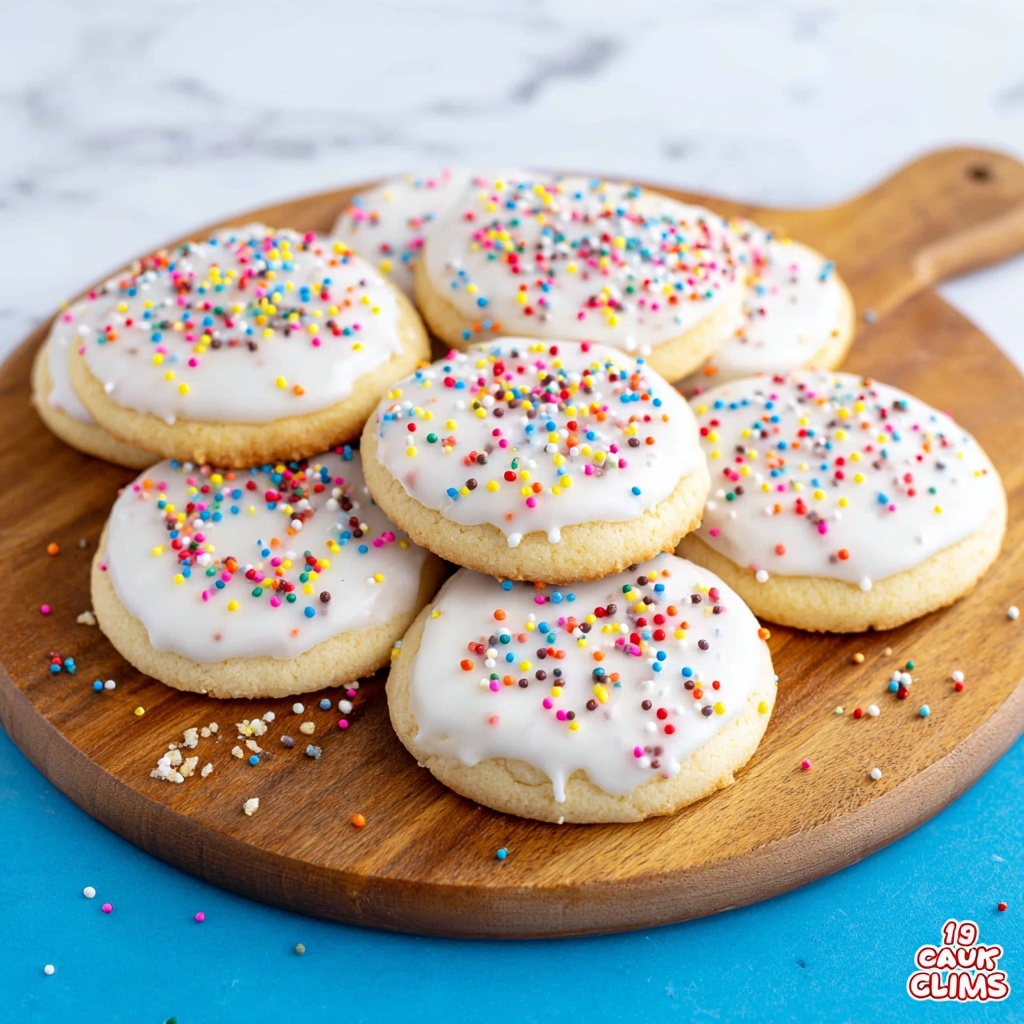
One by one, dip each chilled cookie into the melted candy coating, letting any excess drip off before placing them on waxed paper-lined trays. While the coating is still wet, sprinkle your cookies with colorful sprinkles for that extra festive flair.
Step 8: Chill and Store
Once decorated, transfer your cookies to an airtight container and refrigerate until ready to serve. This helps the coating harden perfectly and preserves freshness.
How to Serve Fruity No-Bake Cookies: Quick, Fun Treat for Everyone! Recipe
Garnishes
These cookies shine on their own, but you can elevate them with delicate edible flowers, shredded coconut for added texture, or a light dusting of powdered sugar for a whimsical touch. Garnishes keep your presentation playful and inviting.
Side Dishes
Pair your Fruity No-Bake Cookies with a simple glass of cold milk or a fruity smoothie to complement the lightness and sweetness. For parties, they also go beautifully alongside a bowl of fresh berries or a creamy yogurt dip.
Creative Ways to Present
Try arranging the cookies stacked in towers, lining them up on colorful platters, or even placing them in clear jars for an eye-catching display. Wrapping a few in cellophane tied with ribbon makes for adorable gifts that friends and family will adore.
Make Ahead and Storage
Storing Leftovers
Your Fruity No-Bake Cookies will stay fresh and delicious when stored in an airtight container in the refrigerator for 3-4 days. This helps keep the candy coating crisp and the inside delightfully chewy.
Freezing
If you want to prepare ahead or have extra cookies, freezing is a fantastic option. Place them in a single layer on a baking sheet to freeze initially, then transfer to a freezer-safe container or bag. They keep beautifully for up to 1 month.
Reheating
Since these are no-bake and best enjoyed chilled, reheating isn’t necessary. Instead, simply let frozen cookies thaw in the refrigerator for a few hours before serving to bring back their full flavor and texture.
FAQs
Can I use a different cereal instead of Fruity Pebbles?
Absolutely! While Fruity Pebbles provide iconic color and flavor, any colorful, crispy cereal will work nicely to keep that joyful crunch and vibrancy in the cookies.
Is it necessary to freeze the cookies before dipping?
Freezing firms the mixture so the cookies hold their shape and don’t fall apart when dipped. Skipping this step can make the dipping messier and the cookies less sturdy.
What if I don’t have white candy coating?
No problem! Semi-sweet chocolate or even colored candy melts can be used instead. Just remember to adjust for sweetness and flavor accordingly.
Can I make these cookies vegan?
With a few swaps like using vegan cream cheese, dairy-free candy melts, and coconut oil instead of shortening, you can enjoy a vegan-friendly version while maintaining the spirit of the Fruity No-Bake Cookies: Quick, Fun Treat for Everyone! Recipe.
How long do these cookies last?
Stored properly in the fridge, they remain fresh and delicious for 3-4 days. For longer storage, freezing is your best bet.
Final Thoughts
There’s no denying the charm and ease of the Fruity No-Bake Cookies: Quick, Fun Treat for Everyone! Recipe. It’s a perfect blend of nostalgic flavors, bright colors, and simple steps that make baking feel like a joyful adventure rather than a chore. Give it a try and watch how quickly these cookies become a new favorite in your home!
“`
Print
Fruity No-Bake Cookies: Quick, Fun Treat for Everyone! Recipe
- Prep Time: 15 minutes
- Cook Time: 0 minutes
- Total Time: 45 minutes
- Yield: 12 servings
- Category: Dessert
- Method: No-Cook
- Cuisine: American
Description
These Fruity No-Bake Cookies are a quick and fun treat perfect for all ages. Featuring vibrant Fruity Pebbles cereal mixed with creamy cream cheese, these colorful cookies are dipped in a luscious white candy coating and topped with sprinkles for a festive touch. No oven required, making it an easy and delightful dessert or snack.
Ingredients
Base
- 3 cups Fruity Pebbles cereal
- 8 oz cream cheese, softened
- 1/2 cup sugar
Coating and Decoration
- 1 cup white candy coating
- 2 tbsp shortening
- 1 tsp lemon extract (optional)
- 1 cup sprinkles (optional)
Instructions
- Crush the cereal: Pour the Fruity Pebbles cereal into a food processor and pulse until finely crushed, creating a colorful, crispy base for your cookies.
- Mix ingredients: In a mixing bowl, combine the crushed cereal with softened cream cheese and sugar. Stir or blend until you get a smooth and uniform mixture.
- Form cookies: With clean hands, scoop the mixture and roll it into 1-inch balls. Then gently flatten each ball to about 1/4-inch thickness to form cookie shapes.
- Freeze to set: Arrange the shaped cookies on a baking sheet and place them in the freezer for 30 minutes or until firm and easy to handle.
- Melt coating: In a microwave-safe bowl, combine the white candy coating and shortening. Heat in short bursts, stirring in between until fully melted and smooth. Optionally stir in lemon extract for added flavor.
- Dip cookies: Quickly dip each chilled cookie into the melted white candy coating, allowing the excess to drip off to prevent pooling.
- Decorate: Place the dipped cookies on waxed paper-lined sheets. While the coating is still wet, sprinkle colorful sprinkles over the top for a fun, festive look.
- Chill and store: Transfer the decorated cookies to an airtight container and refrigerate to keep them fresh and maintain the coating’s firmness.
Notes
- Use any colorful cereal substitute if Fruity Pebbles are unavailable.
- For a less sweet version, reduce the sugar amount.
- Shortening can be replaced with coconut oil for a subtle coconut flavor.
- Lemon extract is optional and can be swapped with vanilla extract as preferred.
- Store cookies in the refrigerator for up to one week.
- Use waxed paper or parchment paper under cookies to prevent sticking.


