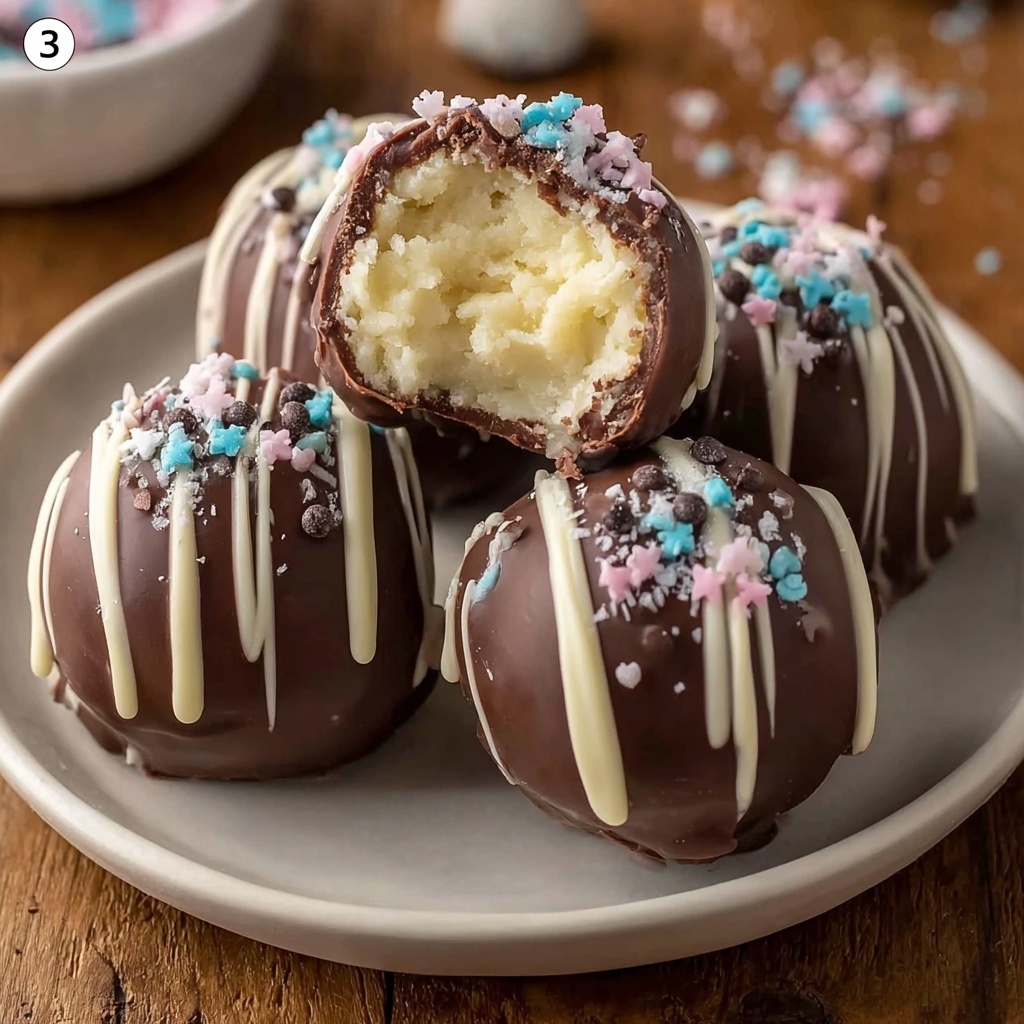
If you have a sweet tooth and love rich, melt-in-your-mouth treats, this Chocolate Buttercream Truffles Recipe will quickly become one of your favorite indulgences. Combining creamy buttercream centers with a smooth, crisp chocolate coating, these truffles balance texture and flavor in every bite. They are surprisingly easy to make, require only a handful of simple ingredients, and elevate any occasion from casual get-togethers to festive celebrations. Trust me, once you try these luscious delights, you’ll be hooked!
Ingredients You’ll Need
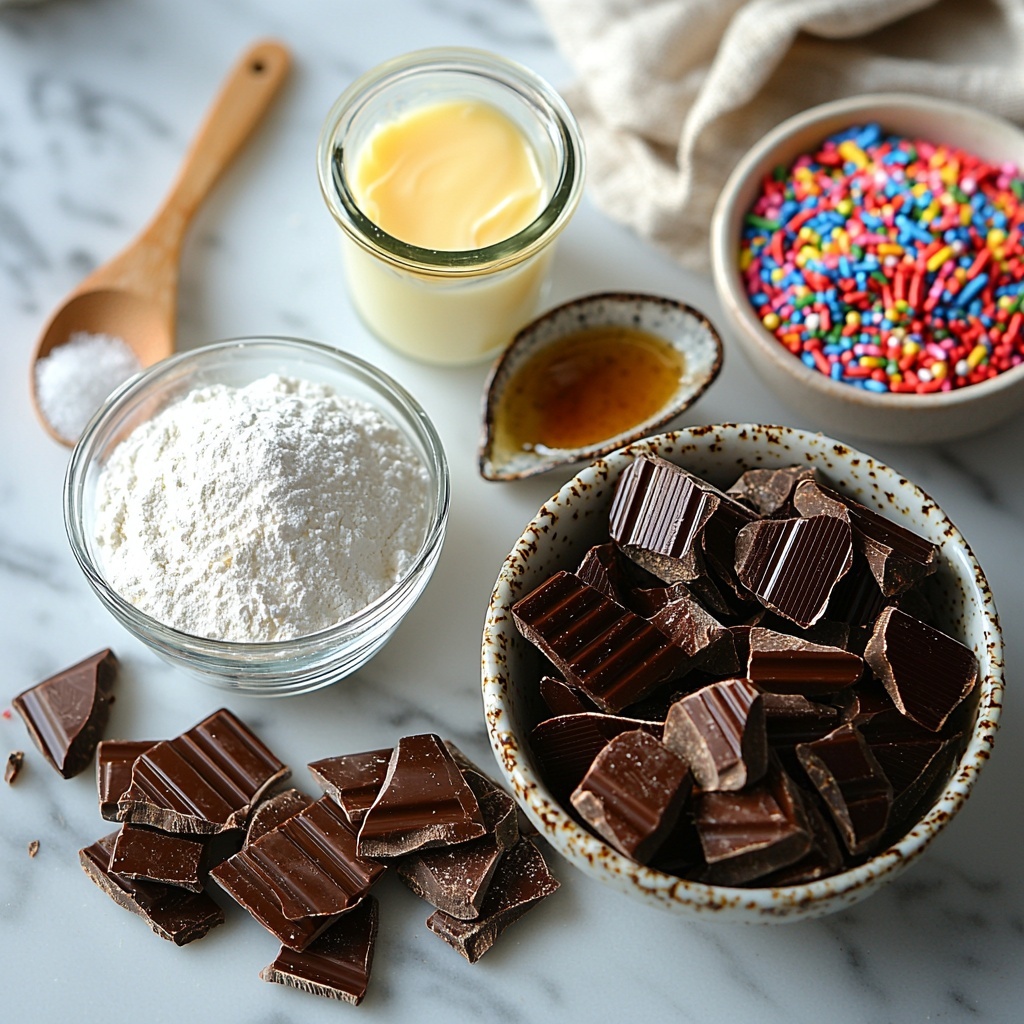
The beauty of this Chocolate Buttercream Truffles Recipe is in its simplicity. Each ingredient plays a crucial role in creating the perfect texture, flavor, and appearance of these truffles, making every bite just right.
- 3/4 cup unsalted butter (room temperature): The base that adds creamy richness and smooth texture to the buttercream filling.
- 4 cups powdered sugar (sifted): Sweetens and thickens the buttercream while keeping it silky and smooth.
- 2 tsp vanilla extract: Adds warm aromatic depth and enhances the chocolate flavor.
- 3 tbsp whole milk: Helps achieve the perfect consistency in the buttercream, making it soft and scoopable.
- 16 oz chocolate melting wafers: The glossy shell that crisps up beautifully and contrasts with the creamy center.
- Sprinkles (optional): A fun way to add color and extra texture for festive occasions or when serving guests.
How to Make Chocolate Buttercream Truffles Recipe
Step 1: Prep Your Ingredients and Tools
Before diving in, gather all your ingredients and make sure the butter is softened to room temperature; this makes mixing much easier. Also, set up your workspace with parchment paper for the finished truffles and have your double boiler ready for melting the chocolate. Good prep makes the process smooth and enjoyable.
Step 2: Make the Buttercream Filling
Beat the unsalted butter using an electric mixer until it becomes fluffy and light—this usually takes about a minute or two. Gradually add the sifted powdered sugar to avoid lumps, then pour in the vanilla extract and whole milk. Continue mixing for 5 minutes, scraping the bowl often to ensure everything is well combined. This long mixing time is essential to create that irresistibly creamy texture in your buttercream.
Step 3: Chill and Shape the Truffles
Once your buttercream is perfectly mixed, cover the bowl and chill the mixture in the refrigerator for 30 minutes. This helps it firm up so that it’s easier to scoop and shape. After chilling, use a small scoop or spoon to form the buttercream into bite-sized balls. Place these balls on a parchment-lined baking sheet and freeze them for 15 minutes. Freezing ensures the centers hold their shape when dipped in melted chocolate.
Step 4: Coat in Melted Chocolate
While the centers are chilling, melt the chocolate wafers gently using a double boiler to prevent burning. Work in small batches to keep the chocolate smooth and warm. Using a fork or dipping tool, carefully dip each frozen buttercream ball into the melted chocolate, making sure it’s fully coated. Allow excess chocolate to drip off before placing the truffle back on parchment. This chocolate shell gives a satisfying snap when you bite into the soft center.
Step 5: Final Touch and Chill
Once dipped, you can add sprinkles on top while the chocolate is still wet—this adds a festive flair and a bit of texture. Then, transfer the entire tray of truffles to the refrigerator to chill for at least 10 minutes or until the chocolate is completely set. This final chill locks in the shape and flavors beautifully.
How to Serve Chocolate Buttercream Truffles Recipe
Garnishes
The classic truffles look stunning on their own, but a sprinkle of crushed nuts, sea salt flakes, or edible gold dust can elevate the presentation impressively. Adding sprinkles or finely grated chocolate also makes for a fun and approachable garnish for kids or party guests.
Side Dishes
Serve these truffles alongside a hot cup of rich espresso, creamy hot chocolate, or a glass of dessert wine to complement their sweetness. Fresh berries also work well, adding a burst of freshness that contrasts nicely with the buttery chocolate.
Creative Ways to Present
For special occasions, arrange your Chocolate Buttercream Truffles Recipe elegantly in small decorative boxes or on tiered dessert stands. Wrapping each truffle in mini cupcake liners or cellophane adds a charming homemade touch, perfect for gifting or party favors.
Make Ahead and Storage
Storing Leftovers
Once made, keep the truffles in an airtight container in the refrigerator. They will stay fresh for up to one week, allowing you to enjoy these little bites of heaven whenever the craving strikes. Just bring them to room temperature a few minutes before serving for the best texture.
Freezing
Chocolate Buttercream Truffles Recipe freezes wonderfully. Place them in a single layer on a baking sheet to freeze initially, then transfer to an airtight container or freezer bag. They can be frozen for up to one month. Thaw overnight in the refrigerator before serving to maintain their perfect texture.
Reheating
There’s no need to reheat these truffles since they’re best enjoyed chilled or at room temperature. If you prefer them slightly softer, simply leave them out of the fridge for about 10 minutes before eating. Avoid microwaving, as it can melt the chocolate coating unevenly.
FAQs
Can I use dark chocolate instead of melting wafers?
Absolutely! Dark chocolate can provide a richer, more intense chocolate flavor. Just be sure to melt it gently using a double boiler to prevent burning and maintain a smooth coating for your truffles.
What if I don’t have a double boiler for melting chocolate?
You can create a makeshift double boiler by placing a heat-proof bowl over a pot of simmering water, making sure the bowl doesn’t touch the water. This indirect heat melts the chocolate gently without scorching it.
Can I make these truffles vegan?
To make a vegan version of this Chocolate Buttercream Truffles Recipe, swap the butter with a plant-based alternative and use a dairy-free milk in place of whole milk. Also, choose vegan-certified chocolate melting wafers to keep the recipe fully plant-based.
How can I prevent the truffles from melting too quickly?
Keeping the truffles chilled before and after dipping helps the chocolate shell set firmly. Store them in a cool environment and avoid leaving them out in warm rooms for extended periods to preserve their shape and texture.
Is it necessary to sift the powdered sugar?
While not absolutely required, sifting powdered sugar removes lumps and helps achieve a smooth, creamy buttercream. It ensures your truffles have a silky consistency and no gritty texture.
Final Thoughts
Making this Chocolate Buttercream Truffles Recipe is such a joy, and the results are nothing short of heavenly. Whether you’re surprising a loved one or treating yourself, these truffles bring a smile with every bite. Don’t hesitate to try making them—you’ll soon see they’re as fun to create as they are delicious to eat!
Print
Chocolate Buttercream Truffles Recipe
- Prep Time: 10 minutes
- Cook Time: 15 minutes
- Total Time: 45 minutes
- Yield: 10 servings
- Category: Dessert
- Method: No-Cook
- Cuisine: American
Description
Decadent and creamy Chocolate Buttercream Truffles featuring a luscious buttercream center coated in rich melted chocolate. These easy-to-make truffles combine smooth butter, powdered sugar, and vanilla, chilled and shaped into bite-sized balls, then dipped in melted chocolate and optionally decorated with sprinkles. Perfect for dessert tables, gifting, or a sweet indulgence.
Ingredients
Buttercream Filling
- 3/4 cup unsalted butter, room temperature
- 4 cups powdered sugar, sifted
- 2 tsp vanilla extract
- 3 tbsp whole milk
Coating and Decoration
- 16 oz chocolate melting wafers
- Sprinkles (optional)
Instructions
- Prep: Prepare all ingredients and equipment for efficient workflow.
- Make Buttercream: Beat unsalted butter until fluffy using a mixer. Gradually add sifted powdered sugar, vanilla extract, and whole milk. Continue mixing for about 5 minutes, scraping down the bowl frequently to ensure even blending and a smooth, creamy texture.
- Chill Buttercream: Transfer the buttercream mixture to the refrigerator and chill for 30 minutes to firm up, making it easier to shape into balls.
- Shape Truffles: Once chilled, scoop the buttercream into small balls using a spoon or scoop. Place balls on a tray and freeze for 15 minutes. Freezing helps the centers hold their shape during chocolate coating.
- Melt Chocolate: While the centers freeze, melt the chocolate wafers using a double boiler method: gently heat chocolate over simmering water until smooth and fully melted, stirring occasionally.
- Coat Truffles: Using a fork, dip each frozen buttercream ball into the melted chocolate, ensuring an even coating. Work in small batches for best results to keep the chocolate at an ideal dipping temperature.
- Decorate: Place coated truffles on parchment paper. If desired, quickly sprinkle with sprinkles while the chocolate is still wet to adhere.
- Set and Chill: Refrigerate the dipped truffles until the chocolate shell is firm and set, about 10 minutes. Once set, transfer to serving or storage container.
Notes
- Room temperature butter ensures smooth mixing and fluffy texture.
- Sifting powdered sugar prevents lumps in the buttercream.
- Freezing the buttercream balls before coating helps maintain shape and prevent melting while dipping.
- Use a double boiler or microwave in short bursts to melt chocolate evenly without scorching.
- Store truffles in an airtight container in the refrigerator for up to one week.
- Sprinkles are optional but add a festive touch and extra texture.
- For a dairy-free version, substitute butter with vegan butter and milk with plant-based milk.
