
If you’re looking to impress your loved one with a charming, indulgent treat, the Valentine Heart Chocolate Fudge Recipe is exactly the sweet magic you need. This triple-layered delight combines the creamy richness of white chocolate with vibrant red layers, carefully crafted into adorable heart shapes that practically ooze affection. Perfectly smooth, melt-in-your-mouth, and adorned with festive sprinkles, this fudge is more than just a dessert—it’s a heartfelt gift you can create in your own kitchen, guaranteed to light up any Valentine’s celebration.
Ingredients You’ll Need
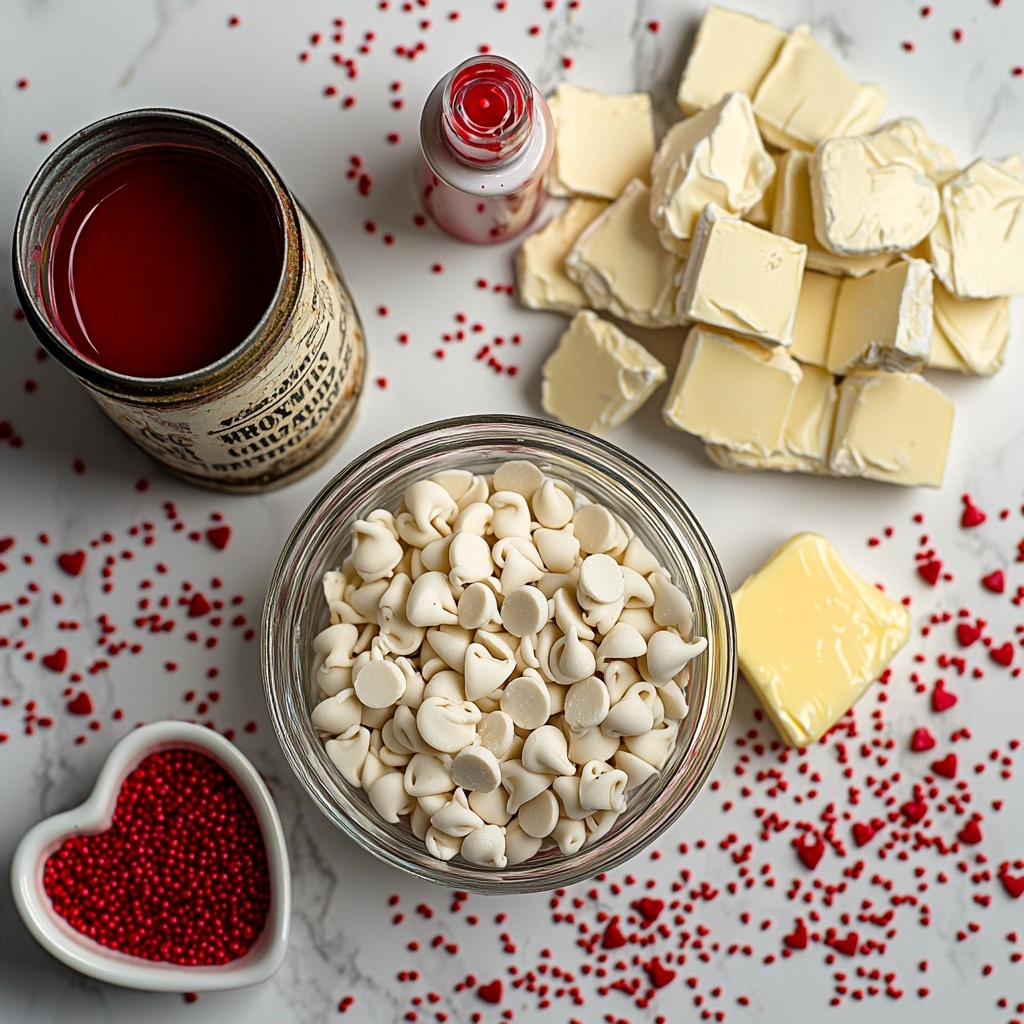
These ingredients may be few, but each plays a vital role in achieving the perfect texture, flavor, and color for your Valentine Heart Chocolate Fudge Recipe. From luscious white chocolate to the beautiful red tint, every element contributes to making this treat irresistible.
- White Chocolate Chips (3½ cups): Provides the creamy sweetness and smooth base essential for fudge’s signature melt.
- Sweetened Condensed Milk (1 can, 14 ounces): Adds richness and a glossy finish while sweetening the fudge perfectly.
- Unsalted Butter (3 tablespoons): Enhances creaminess and helps the fudge set with a silky texture.
- Red Food Coloring (about 10 drops): Gives the fudge its charming Valentine’s Day pop of color; adjust to get your perfect shade of red.
- Heart-shaped Sprinkles (1 tablespoon): Adds that final decorative touch to your Valentine hearts, making them festive and cute.
How to Make Valentine Heart Chocolate Fudge Recipe
Step 1: Prepare the Pan
First things first, line an 8 x 8-inch square pan with parchment paper or lightly spray it with non-stick spray and cover with aluminum foil. This prep helps the fudge come out smoothly later without sticking, so your beautiful layers stay intact.
Step 2: Melt the First Red Layer
In a microwave-safe bowl, combine two-thirds of the white chocolate chips with two-thirds of the sweetened condensed milk and 2 tablespoons of unsalted butter. Microwave in 20-second bursts, stirring each time until perfectly smooth. This careful melting prevents graininess and creates a luscious base for your vibrant red layer.
Step 3: Add Red Food Coloring
Mix about 10 drops of red food coloring into your melted white chocolate mixture, stirring evenly until the fudge has turned to a gorgeous, festive red. Feel free to add more if you want a bolder hue—this is your chance to make it just right.
Step 4: Set the Red Layer
Spread half of this sticky red fudge mixture evenly into the prepared pan. Don’t worry about the texture—it’s supposed to be a little sticky. Pop it into the freezer for a few minutes until firm. Meanwhile, keep the remaining red mixture warm by wrapping the bowl in towels so it stays soft for later use.
Step 5: Melt the White Layer
Use a clean bowl to melt the remaining white chocolate chips with the leftover sweetened condensed milk and 1 tablespoon of butter, again microwaving in 20-second intervals and stirring until silky smooth. This white layer will beautifully contrast with the vibrant reds.
Step 6: Layer the White Fudge
Pour the white fudge over your now-set red layer, gently spreading it to cover the red beneath completely. Return the pan to the freezer for a few minutes to firm up this stunning white middle layer.
Step 7: Warm and Top with the Remaining Red Fudge
Rewarm the leftover red fudge mixture slightly so it’s pliable enough to spread easily. Spoon it over the white layer and smooth it out to finish off your triple-layer masterpiece with a vibrant top coat.
Step 8: Chill Completely
Cover the entire pan tightly with plastic wrap and refrigerate for about 2 hours. This resting time is essential for getting your Valentine Heart Chocolate Fudge Recipe perfectly set and ready to slice with clean edges.
Step 9: Cut Out the Hearts and Decorate
Lift the fudge out by the parchment paper and use a small heart-shaped cookie cutter to cut into adorable hearts. Sprinkle on heart-shaped sprinkles for that extra touch of festive cheer, and voilà—your charming Valentine treat is ready to dazzle!
How to Serve Valentine Heart Chocolate Fudge Recipe
Garnishes
Sprinkling heart-shaped sprinkles on top not only adds a playful texture but also enhances the festive look. For an extra touch, consider a light dusting of edible glitter or a drizzle of melted dark chocolate for contrast.
Side Dishes
This fudge pairs magically well with a warm cup of coffee, a creamy hot chocolate, or even a simple glass of cold milk. The sweetness balances beautifully with these drinks, creating a cozy and indulgent moment.
Creative Ways to Present
Present your Valentine Heart Chocolate Fudge Recipe on a decorative platter lined with fresh rose petals or wrapped individually in wax paper tied with red ribbon. These personal touches elevate your homemade creation into a gift that feels truly special.
Make Ahead and Storage
Storing Leftovers
Keep leftover fudge in an airtight container at room temperature for up to a week. This prevents it from drying out while maintaining its soft, creamy consistency that melts in your mouth.
Freezing
If you want to save fudge for later, wrap it tightly in plastic wrap and place it in a freezer-safe container. Frozen fudge stays delicious for up to three months—just thaw it in the fridge overnight before enjoying.
Reheating
Fudge is best enjoyed at room temperature, so avoid reheating in the microwave which can cause graininess. Simply let frozen or refrigerated fudge sit out for about 30 minutes until soft enough to savor perfectly.
FAQs
Can I use dark chocolate instead of white chocolate?
Absolutely! Using dark chocolate will give a wonderfully rich and deeper flavor, though it will change the look and sweetness level from the classic Valentine Heart Chocolate Fudge Recipe.
Why does my fudge sometimes turn grainy?
Fudge can become grainy if overheated or if sugar crystals form during the cooling process. Careful melting in short bursts and constant stirring helps maintain a smooth, creamy texture.
Can I skip the red food coloring?
You can, but the red layers give the Valentine Heart Chocolate Fudge Recipe its festive character. Without it, you’ll have a delicious white chocolate fudge, just not quite as visually stunning for Valentine’s Day.
How do I ensure the layers don’t mix?
Let each layer set firmly in the freezer before adding the next one. This creates distinct layers and prevents blending, giving you that gorgeous triple-layered appearance.
Is this recipe suitable for beginners?
Totally! The steps are straightforward, and the ingredients are simple. With a little patience and care, even first-time fudge makers can create stunning results.
Final Thoughts
Honestly, the Valentine Heart Chocolate Fudge Recipe is such a joy to make and share. It’s the perfect way to show love through something handmade, delicious, and absolutely delightful. Give it a try—you’ll love the smiles as much as the fudge itself!
Print
Valentine Heart Chocolate Fudge Recipe
- Prep Time: 15 minutes
- Cook Time: 10 minutes
- Total Time: 2 hours 25 minutes
- Yield: 10 servings
- Category: Dessert
- Method: Microwaving
- Cuisine: American
Description
This Valentine Heart Chocolate Fudge recipe features a delightful triple-layered treat with creamy white chocolate fudge tinted red for a festive touch. Easy to prepare in the microwave, this recipe combines smooth white chocolate, sweetened condensed milk, and butter to create rich, melt-in-your-mouth fudge. Perfect for Valentine’s Day or any romantic occasion, the fudge is cut into adorable heart shapes and decorated with heart-shaped sprinkles for a charming presentation.
Ingredients
Fudge Layers
- 3½ cups (two 12-ounce packages) White Chocolate Chips, divided
- 1 can (14 ounces) Sweetened Condensed Milk, divided
- 3 tablespoons Unsalted Butter, divided
- Red Food Coloring, about 10 drops or to desired shade
Decoration
- 1 tablespoon Heart-shaped Sprinkles
Instructions
- Prepare the Pan: Line an 8 x 8-inch square pan with parchment paper or spray it with non-stick spray and cover with aluminum foil to ensure easy removal of the fudge after it has set.
- Melt First Red Layer: In a microwave-safe bowl, combine 2 ¼ cups (two-thirds) of the white chocolate chips, two-thirds of the sweetened condensed milk, and 2 tablespoons of unsalted butter. Microwave in 20-second bursts, stirring thoroughly after each, until the mixture is melted and smooth, usually under 2 minutes. Be careful not to overheat to prevent graininess.
- Add Red Coloring: Stir in about 10 drops of red food coloring until the mixture is evenly tinted. Adjust the coloring to your preferred intensity.
- Set Red Layer: Spoon half of the red fudge mixture into the prepared pan and spread it evenly despite its sticky texture. Place the pan in the freezer for a few minutes until the fudge firms up. Meanwhile, keep the remaining red mixture warm by wrapping the bowl in towels to prevent hardening.
- Melt White Layer: In a clean microwave-safe bowl, combine the remaining 1 ¼ cups of white chocolate chips, the rest of the sweetened condensed milk, and 1 tablespoon of unsalted butter. Microwave in 20-second bursts, stirring after each, until fully melted and smooth.
- Layer White Fudge: Pour the melted white fudge over the set red fudge layer, spreading gently to cover completely. Return the pan to the freezer for a few minutes to let this layer set.
- Warm Remaining Red Fudge: Warm the leftover red fudge slightly so it becomes stirrable again. This will make it easier to spread as the final top layer.
- Top with Red Fudge: Spoon the warmed red fudge mixture over the white layer, smoothing it evenly to complete the triple-layered effect.
- Chill: Cover the pan tightly with plastic wrap and refrigerate for about 2 hours until the entire fudge is fully set and firm.
- Cut Hearts: Remove the fudge by lifting the parchment paper from the pan. Using a small heart-shaped cookie cutter, cut out heart-shaped pieces efficiently with minimal fudge waste.
- Decorate: Evenly sprinkle heart-shaped sprinkles over the cut fudge hearts for a festive, decorative finish. Serve and enjoy your Valentine treats!
Notes
- Be careful when melting chocolate in the microwave to avoid overheating, which can cause the mixture to become grainy.
- Keep leftover fudge mixtures warm while working in layers to maintain proper spreading consistency.
- Using parchment paper and aluminum foil in the pan helps with easy removal of the fudge layers.
- Adjust the amount of red food coloring depending on the desired shade; start with fewer drops and add more if needed.
- This fudge should be stored covered in the refrigerator and enjoyed within one week for best freshness.


