“`html
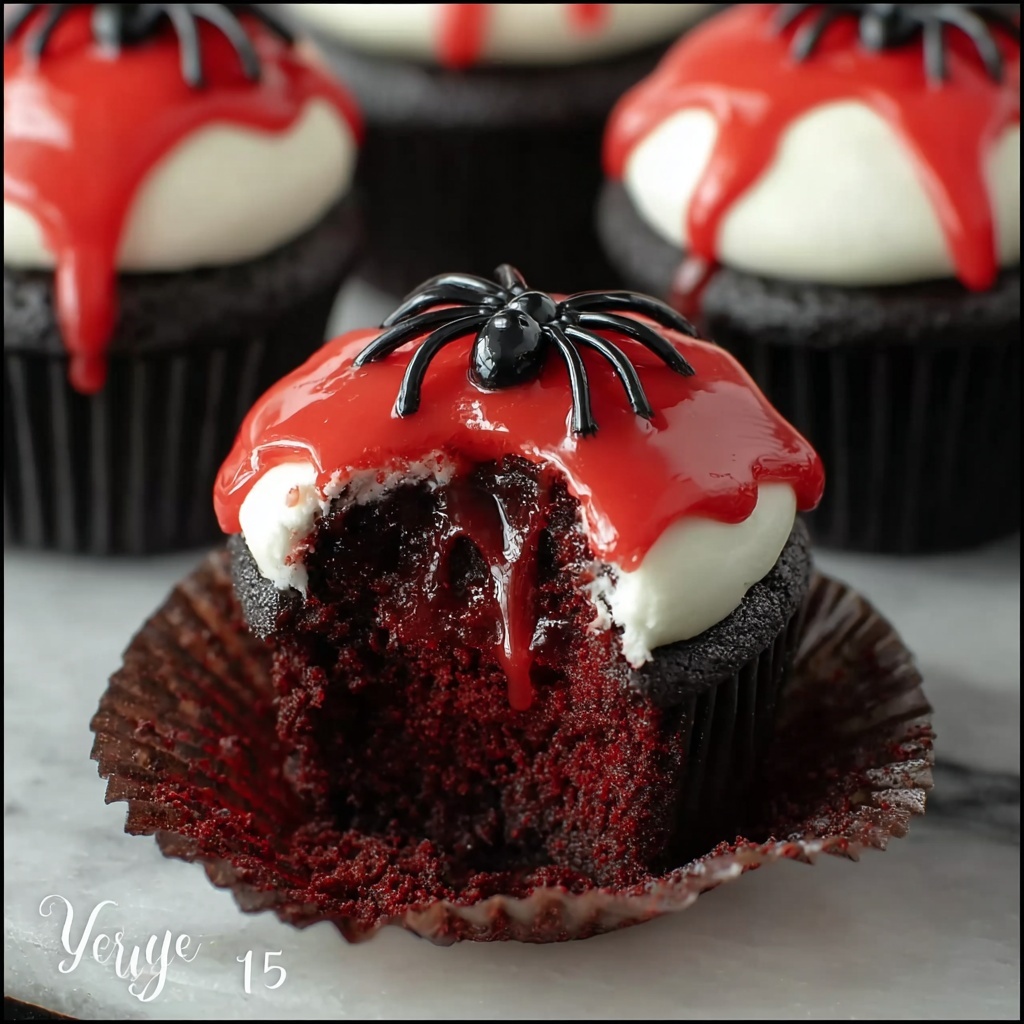
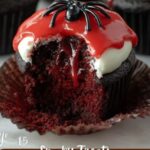
If you are looking for a show-stopping treat that perfectly captures the spooky spirit of October, you have to try this Vampire Bite Halloween Cupcakes Recipe. These cupcakes don’t just taste amazing – they tell a deliciously eerie story with every bite. From their vibrant blood-red centers to the pale, skin-like frosting topped with candy fangs and dripping ‘blood,’ they are a Halloween centerpiece that’s as fun to make as they are to eat. Trust me, once you try these, they’ll become your new go-to for Halloween parties and thrilling dessert tables.
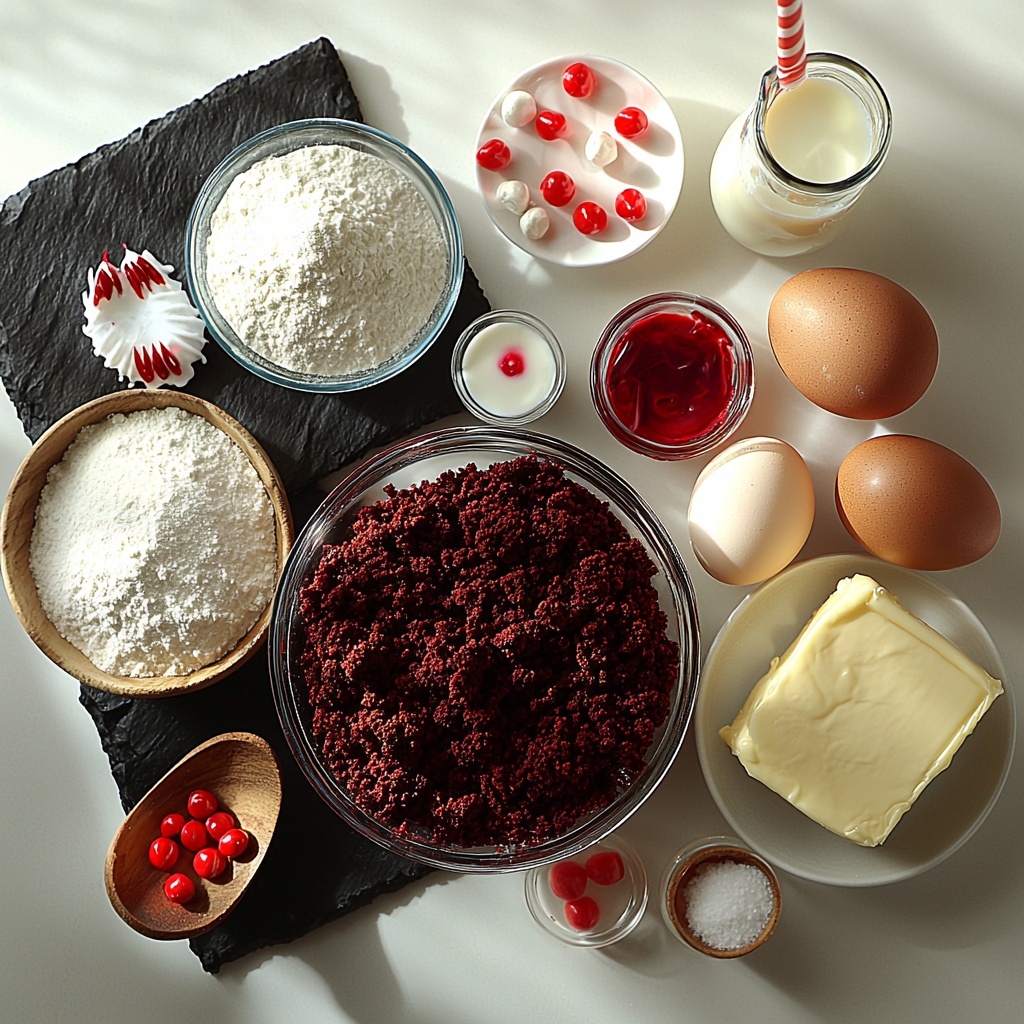
Ingredients You’ll Need
This Vampire Bite Halloween Cupcakes Recipe is crafted with simple pantry staples that work together to create rich flavors, eye-catching colors, and amazing textures. Each ingredient plays a vital role – from the soft cake base to the luscious red filling and the smooth, cream-colored frosting that resembles vampire skin.
- 1 and 1/2 cups all-purpose flour: Provides the perfect structure for soft, tender cupcakes.
- 1 cup granulated sugar: Sweetens and helps create a light crumb texture.
- 1/2 cup unsalted butter, softened: Adds moisture and a rich buttery flavor.
- 2 large eggs: Bind the ingredients beautifully and add richness.
- 1/2 cup buttermilk: Keeps cupcakes moist while adding a slight tang.
- 2 tablespoons cocoa powder: Gives a subtle chocolate undertone that deepens the red velvet flavor.
- 1 tablespoon gel-based red food coloring: Ensures a vibrant and lasting red hue.
- 1 teaspoon vanilla extract: Enhances overall flavor with warmth.
- 1/2 teaspoon baking soda: Lightens the cupcake’s texture.
- 1 teaspoon white vinegar: Reacts with baking soda to create lift and tenderness.
- 1/4 teaspoon salt: Balances sweetness and enhances flavors.
- 1/2 cup red velvet cake crumbs (from cupcake centers): The secret to that luscious vampire bite filling.
- 1/3 cup sweetened condensed milk: Adds creaminess to the filling.
- 1 tablespoon unsalted butter, melted: Enriches the filling’s texture.
- 1 to 2 tablespoons red food coloring: For a bold, striking red filling.
- 1 cup unsalted butter, softened: Base for the skin-toned buttercream frosting.
- 3 to 4 cups powdered sugar, sifted: Sweetens and thickens frosting to the perfect consistency.
- 2 to 3 tablespoons milk or heavy cream: Adjusts frosting texture.
- A few drops ivory or peach food coloring: Creates a pale, skin-like tone for the frosting.
- 1 teaspoon vanilla extract: Adds subtle flavor to the buttercream.
- Candy fangs or small dots of red gelatin: The crucial finishing touch for vampire teeth.
- Red syrup or edible red gel: For that authentic dripping blood effect.
- Red straws (for decoration, not edible): Optional, but adds a fun Halloween accent if desired.
How to Make Vampire Bite Halloween Cupcakes Recipe
Step 1: Prepare and Bake the Cupcakes
Start by preheating your oven to 350°F (175°C) and line a 12-cup muffin tin with paper liners. Mixing the butter and sugar until light and fluffy creates a base with wonderful texture. The eggs are added one at a time to keep the batter smooth and fluffy, while vanilla and gel-based red food coloring give these cupcakes their classic vibrant red tone.
Step 2: Combine Dry Ingredients and Batter
Whisk the flour, cocoa powder, and salt in a separate bowl, then gently alternate adding these dry ingredients and buttermilk to your butter mixture. This careful folding maintains the delicate crumb. Baking soda and vinegar activate to help the cupcakes rise beautifully and stay tender.
Step 3: Bake and Cool
Fill each muffin cup about two-thirds full and bake for 18 to 20 minutes until a toothpick comes out clean. After letting them cool in the pan briefly, transfer them to a wire rack to cool completely, then remove the liners.
Step 4: Make the Vampire Bite Filling
Core the center out of each cupcake gently using a sharp knife or cupcake corer. Mix the red velvet crumbs with sweetened condensed milk, melted butter, and extra red food coloring until the filling is creamy and vivid. Spoon this luscious filling into each cupcake cavity, filling them generously to create that intriguing “bite” effect.
Step 5: Prepare the Skin-Toned Buttercream Frosting
Beat softened butter until creamy, then sift in powdered sugar gradually, adding vanilla and milk or cream to achieve a fluffy frosting. Blend in drops of ivory or peach food coloring until you have a pale, natural skin tone – this frosting is essential to mimic vampire skin for your Vampire Bite Halloween Cupcakes Recipe.
Step 6: Frost and Decorate
Spread or pipe the frosting over each filled cupcake. Press candy fangs gently into the tops or create small red gelatin dots to form teeth. Finally, drizzle red syrup or edible gel around the fangs to imitate dripping blood for a delightfully spooky look. Chill briefly if you want a firmer finish before serving.
How to Serve Vampire Bite Halloween Cupcakes Recipe
Garnishes
The key to making these cupcakes truly pop is in your garnishes. Candy fangs are a playful, thematic choice, but you can also create two tiny red gelatin dots as teeth for a subtle, creepy vibe. The dripping red gel or syrup completes the gore factor perfectly, making each cupcake look like a fresh vampire bite. Adding red straws nearby can add a quirky, blood-themed touch perfect for parties.
Side Dishes
Pair these Vampire Bite Halloween Cupcakes Recipe treats with rich hot chocolates or spiced apple cider for a cozy autumn pairing. A simple spread of fruit skewers with dark berries or an assortment of Halloween cookies complements the cupcakes without overwhelming the flavors.
Creative Ways to Present
Arrange your cupcakes on a black platter lined with fake spider webs or autumn leaves for maximum spooky effect. You can nestle little vampire figurines or plastic bats around the cupcakes, or display them on tiered cake stands decorated with Halloween-themed ribbon. Play with dim lighting and candlelight to set a haunting mood that invites your guests to indulge in these hauntingly delicious bites.
Make Ahead and Storage
Storing Leftovers
After enjoying your Vampire Bite Halloween Cupcakes Recipe, store any leftovers in an airtight container in the refrigerator. The cupcakes will keep moist and fresh for 3 to 4 days. Make sure to keep them covered to prevent the frosting from drying out or absorbing other odors from the fridge.
Freezing
If you want to save these cupcakes for longer, freeze them without the candy fangs or red syrup decorations. Wrap each cupcake individually in plastic wrap, then place them in an airtight container or freezer bag. They can be frozen for up to 2 months and thawed overnight in the refrigerator before decorating and serving.
Reheating
Reheating cupcakes isn’t usually necessary, but if you prefer them slightly warm, microwave for about 10 to 15 seconds at room temperature. Avoid heating decorated cupcakes to preserve the integrity of the frosting and garnishes.
FAQs
Can I use regular liquid food coloring instead of gel-based?
While you can, gel-based food coloring produces more vibrant and intense colors without thinning your batter, which is essential for that striking red vampire look. Regular liquid colorings might dilute the batter and lead to a less vivid result.
How do I remove the cupcake centers without breaking the cupcakes?
Using a sharp knife or a cupcake corer helps you remove the center carefully. Work slowly and gently to avoid cracking the sides. If you find it difficult, chilling the cupcakes briefly before coring can help them firm up and hold shape.
What can I substitute for candy fangs if I can’t find them?
If candy fangs aren’t available, small red gelatin dots, white candy melts shaped into small pointed teeth, or even mini marshmallow slivers can make fun, creative alternatives for the vampire bite effect.
Can I make the frosting dairy-free?
Absolutely! Substitute the unsalted butter with a dairy-free spread and use a plant-based milk or cream alternative. Just be sure these alternatives whip up well to maintain the smooth, creamy texture your frosting needs.
Will these cupcakes be too sweet for adults?
These cupcakes balance sweetness with the slight tang of buttermilk and cocoa powder. The red velvet crumbs in the filling add richness without overwhelming sugariness. The overall flavor is richly sweet but not cloying, appealing to both adults and kids.
Final Thoughts
I promise, making this Vampire Bite Halloween Cupcakes Recipe will be one of the most fun and rewarding baking adventures you embark on this spooky season. The combination of dramatic presentation and irresistible flavor means they’re guaranteed to impress your guests while delighting the senses. Don’t hesitate to try it yourself — these cupcakes will steal the show and your heart with every bite!
“`
Print
Vampire Bite Halloween Cupcakes Recipe
- Prep Time: 20 minutes
- Cook Time: 20 minutes
- Total Time: 50 minutes
- Yield: 12 cupcakes
- Category: Dessert
- Method: Baking
- Cuisine: American
- Diet: Vegetarian
Description
These Vampire Bite Halloween Cupcakes are a spooky and delicious treat perfect for Halloween parties. Featuring red velvet cupcakes filled with a creamy red velvet center, topped with a skin-toned buttercream and decorated with candy fangs and dripping red syrup to mimic vampire bites, these cupcakes are as fun to make as they are to eat.
Ingredients
Cupcake Batter
- 1 and 1/2 cups all-purpose flour
- 1 cup granulated sugar
- 1/2 cup unsalted butter, softened
- 2 large eggs
- 1/2 cup buttermilk
- 2 tablespoons cocoa powder
- 1 tablespoon gel-based red food coloring
- 1 teaspoon vanilla extract
- 1/2 teaspoon baking soda
- 1 teaspoon white vinegar
- 1/4 teaspoon salt
Filling
- 1/2 cup red velvet cake crumbs (from cupcake centers)
- 1/3 cup sweetened condensed milk
- 1 tablespoon unsalted butter, melted
- 1 to 2 tablespoons red food coloring
Frosting
- 1 cup unsalted butter, softened
- 3 to 4 cups powdered sugar, sifted
- 2 to 3 tablespoons milk or heavy cream
- A few drops ivory or peach food coloring
- 1 teaspoon vanilla extract
Decoration
- Candy fangs or small dots of red gelatin
- Red syrup or edible red gel
- Red straws (for decoration, not edible)
Instructions
- Preheat Oven: Preheat your oven to 350°F (175°C) and line a 12-cup muffin tin with paper liners.
- Cream Butter and Sugar: In a large bowl, cream the softened butter with granulated sugar for 2 to 3 minutes until the mixture is light and fluffy.
- Add Eggs: Incorporate the eggs one at a time, beating well after each addition to ensure a smooth batter.
- Mix in Flavors and Coloring: Stir in the vanilla extract and gel-based red food coloring until the batter achieves a vibrant red hue.
- Combine Dry Ingredients: In a separate bowl, whisk together the flour, cocoa powder, and salt.
- Alternate Adding Dry Ingredients and Buttermilk: Gradually add the dry ingredients and buttermilk alternately to the butter mixture, beginning and ending with the dry ingredients, mixing until just combined.
- Add Leavening: Stir in the baking soda and white vinegar to activate the leavening agents.
- Fill Muffin Cups: Divide the batter evenly among the muffin cups, filling each about two-thirds full.
- Bake: Bake for 18 to 20 minutes, or until a toothpick inserted in the center comes out clean.
- Cool Cupcakes: Allow the cupcakes to cool in the pan for 5 minutes, then transfer them to a wire rack to cool completely.
- Remove Liners: Once cool, remove the paper liners from the cupcakes.
- Prepare Filling: In a small bowl, combine the red velvet cake crumbs, sweetened condensed milk, and melted butter.
- Add Food Coloring to Filling: Stir in red food coloring until achieving an intense, vibrant red color.
- Core Cupcakes: Using a sharp knife or cupcake corer, carefully remove a small portion from the center of each cooled cupcake.
- Fill Cupcakes: Gently spoon the creamy red velvet filling into each cupcake cavity, filling it to the top.
- Make Buttercream: In a large bowl, beat the softened butter until creamy.
- Add Sugar Gradually: Gradually add the sifted powdered sugar, one cup at a time, mixing on low speed.
- Add Vanilla and Milk: Pour in the vanilla extract and 2 tablespoons of milk or cream.
- Beat Until Fluffy: Continue beating until the frosting is smooth and fluffy.
- Color Buttercream: Blend in a few drops of ivory or peach food coloring until the buttercream reaches a pale, skin-like tone.
- Frost Cupcakes: Spread or pipe the skin-tone buttercream evenly over each filled cupcake.
- Chill Frosted Cupcakes: Chill the cupcakes briefly if a firmer texture for the frosting is desired before decorating.
- Decorate with Fangs or Gelatin: Press candy fangs or position two red gelatin dots close together on each cupcake’s surface to simulate vampire bites.
- Add Dripping Blood Effect: Drizzle red syrup or edible red gel from each bite to mimic dripping blood.
- Serve: Arrange the decorated cupcakes on a dark serving platter and serve immediately for maximum spooky effect.
Notes
- Ensure cupcakes are completely cooled before filling and frosting to prevent melting or sliding.
- Gel-based food coloring provides a more vibrant and intense color without thinning the batter.
- Red velvet cake crumbs for the filling can be saved from the cupcake centers you core out.
- Use ivory or peach food coloring sparingly to achieve just the right skin tone in the buttercream.
- Red syrup or edible gel can be store-bought or homemade (like a simple raspberry syrup) to enhance the realistic blood effect.
- Decorate cupcakes just before serving to maintain freshness and presentation.
- Red straws are for decoration only and are not meant to be eaten.

