
If you’re looking for a nostalgic treat that’s both delicious and incredibly simple to make, you absolutely have to try this 3 Ingredient Homemade Fruit Roll Ups Recipe. It takes just fresh fruit, a natural sweetener, and a splash of lemon juice to create chewy, sweet fruit leathers that bring back all the feelings of childhood lunchbox treasures but with a wholesome, homemade twist. You’ll be amazed at how such a straightforward recipe transforms fresh fruit into a chewy delight that’s bursting with natural flavors and perfect for snacking anytime.
Ingredients You’ll Need
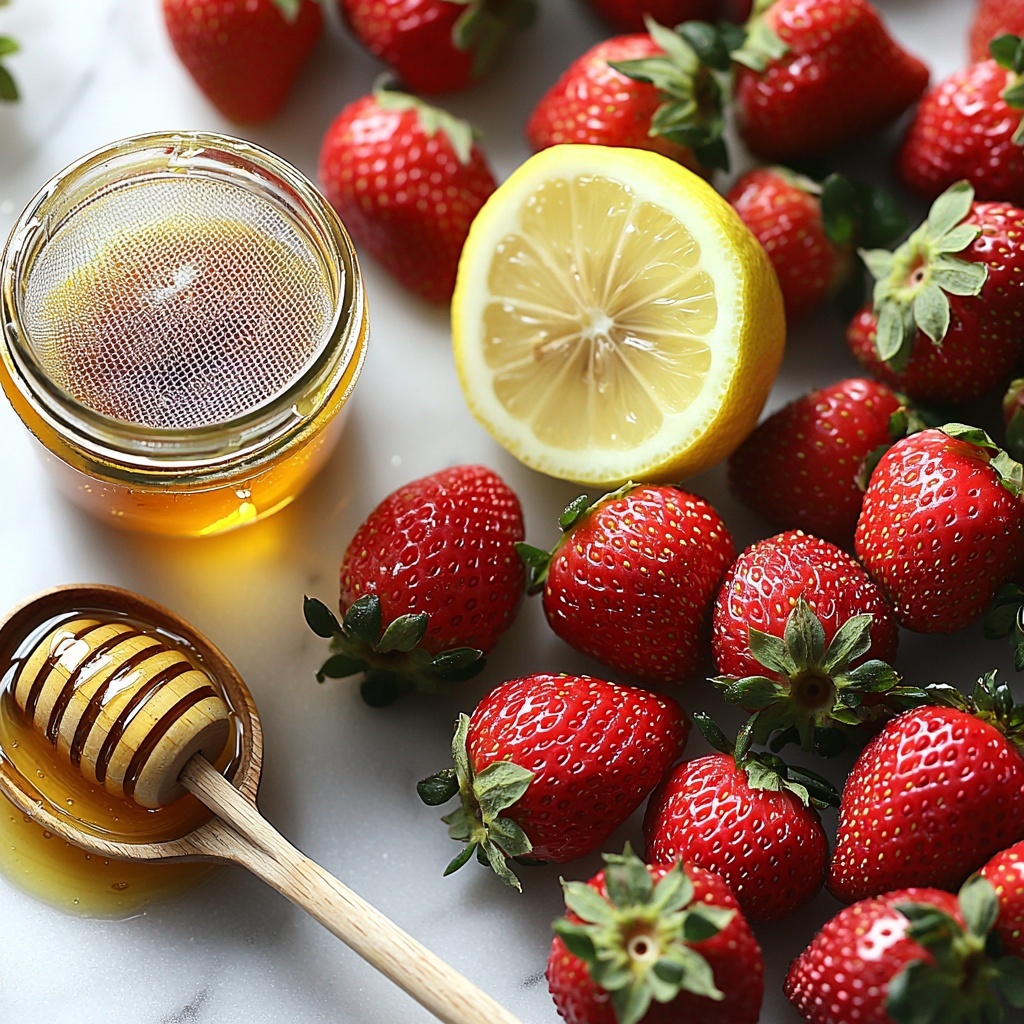
This recipe keeps things refreshingly simple, relying on just three vibrant ingredients that each play a starring role in the final flavor and texture. The freshness of the fruit brings natural sweetness and juiciness, while the honey (or maple syrup) adds a perfect touch of extra sweetness. The lemon juice adds that subtle zing to brighten everything up and balance the flavors beautifully.
- 4 cups fresh strawberries (or other fruit): Choose ripe, sweet fruit for the best flavor and natural sugars that produce perfect chewiness.
- 2–3 tablespoons honey or maple syrup: Adds natural sweetness and a hint of warmth; start with less and adjust to your taste.
- 1 tablespoon fresh lemon juice: Brightens the flavor, balancing sweetness and helping preserve color.
How to Make 3 Ingredient Homemade Fruit Roll Ups Recipe
Step 1: Prepare the fruit
Start by hulled and chopped strawberries (or your chosen fruit) into manageable pieces, then toss them into a blender or food processor. Blend until the mixture is silky smooth, pausing occasionally to scrape down the sides. A perfectly smooth purée helps create that classic fruit leather texture everyone loves. The finer the blend, the better the final roll-ups.
Step 2: Sweeten and brighten
Next, add the honey or maple syrup and fresh lemon juice to your fruit purée. Blend briefly to combine everything evenly. Taste as you go, because depending on your fruit’s natural sweetness, you may want to add a bit more or less honey. This balancing act is like crafting a homemade jam — it’s all about finding that perfect flavor harmony.
Step 3: Strain (optional)
If you’re aiming for an ultra-smooth and polished fruit leather without any seeds, pour the purée through a fine mesh sieve. This step is optional but worth it if you want a silky, seed-free texture that feels extra special.
Step 4: Spread evenly
Preheat your oven to 170°F (75°C), or the lowest setting available. Line a baking sheet with parchment paper or a silicone mat, then pour in your fruit purée. Use a spatula to spread it out evenly in a thin layer, about 1/8 inch thick. Consistency here is key — an even thickness ensures your fruit roll ups dry thoroughly and evenly.
Step 5: Bake low and slow
Pop the tray in the oven and prepare for patience. Let the fruit mixture dry for 4–6 hours until it’s dry to the touch but still slightly tacky in the center. This slow baking process intensifies the natural sweetness and turns the purée into a chewy, flavorful fruit leather you won’t be able to resist.
Step 6: Cool and roll
Once baked, let the fruit sheet cool completely on the tray. Use scissors or a sharp knife to cut the sheet into strips. Roll each strip up with the parchment paper for classic 3 Ingredient Homemade Fruit Roll Ups that are ready to satisfy your fruit snack cravings.
How to Serve 3 Ingredient Homemade Fruit Roll Ups Recipe
Garnishes
While fruit roll ups shine on their own, you can sprinkle a little cinnamon or finely grated coconut on top before baking to add a subtle twist. These garnishes enhance the flavor and give each roll up an extra layer of character, making snack time feel even more special.
Side Dishes
Pair homemade fruit roll ups with a creamy yogurt dip or a handful of nuts for a snack that’s balanced with protein and texture. They’re also fantastic alongside a cheese platter, where their natural sweetness cuts through savory bites beautifully.
Creative Ways to Present
For kid-friendly fun, cut your roll ups into small shapes with cookie cutters or roll them into colorful pinwheels. They also make adorable homemade party favors when wrapped with a ribbon and stacked in little jars or boxes.
Make Ahead and Storage
Storing Leftovers
If you don’t finish your fruit roll ups right away, wrap them tightly in parchment paper or plastic wrap and store them in an airtight container. Kept at room temperature in a cool, dry place, they’ll stay fresh and chewy for up to two weeks.
Freezing
Want to keep these fruity treats around even longer? Freeze the rolled-up strips in a sealed freezer bag. When properly stored, they maintain their chewy texture and vibrant flavor for up to three months, making them a perfect batch-to-batch treat.
Reheating
There’s no need to reheat fruit roll ups before enjoying—they’re designed to be ready to eat right out of the package. If you want to soften them a bit, simply let them sit at room temperature for a few minutes after being in the fridge or freezer.
FAQs
Can I use other fruits instead of strawberries?
Absolutely! This 3 Ingredient Homemade Fruit Roll Ups Recipe is incredibly versatile. You can swap strawberries for mango, peach, raspberry, or even a blend of your favorite fruits. Just keep in mind that the sweetness and drying time might vary slightly based on the fruit’s natural sugar content and moisture.
Is it necessary to use honey or maple syrup?
While the fruit’s natural sugars contribute a lot of sweetness, adding honey or maple syrup helps balance tartness and adds richness. If your fruit is very ripe and sweet, you can reduce or skip the sweetener, though the lemon juice usually remains important for brightness.
What is the best way to store homemade fruit roll ups?
Store them wrapped tightly in parchment paper inside an airtight container away from heat and humidity. This keeps them chewy and fresh for up to two weeks. For longer storage, freezing works well without compromising texture or flavor.
How thin should I spread the fruit purée?
About 1/8 inch thick is ideal. Too thick means longer drying and potentially chewy centers, while too thin can cause brittleness. An even thickness ensures consistent drying and that perfect chewy texture.
Can I make this recipe without an oven?
You can use a dehydrator if you have one, setting it to around 135-140°F. Drying times will vary, so check occasionally for the right texture. The oven method is great for most kitchens and achieves fantastic results with patience.
Final Thoughts
I hope you feel inspired to try this 3 Ingredient Homemade Fruit Roll Ups Recipe because it truly is one of those simple homemade treats that feels like a gift to yourself and your loved ones. Combining fresh fruit, a touch of sweetness, and a splash of lemon turns into a chewy, delightful snack that’s as fun to make as it is to eat. Give it a go—you might just find your new favorite, healthy snack staple!
Print
3 Ingredient Homemade Fruit Roll Ups Recipe
- Prep Time: 15 minutes
- Cook Time: 5 hours
- Total Time: 5 hours 15 minutes
- Yield: 8–10 roll-ups
- Category: Snack
- Method: Baking
- Cuisine: American
- Diet: Vegetarian
Description
Recapture childhood nostalgia with these easy 3 Ingredient Homemade Fruit Roll Ups made from fresh fruit, honey or maple syrup, and lemon juice. Slow-baked to chewy perfection, these natural fruit leathers are a healthy, delicious snack that’s simple to make at home.
Ingredients
Fruit Purée
- 4 cups fresh strawberries (or other fruit), hulled and chopped
Sweetener and Flavor
- 2–3 tablespoons honey or maple syrup
- 1 tablespoon fresh lemon juice
Instructions
- Prepare the fruit: Place the chopped strawberries into a blender or food processor and blend until completely smooth, pausing to scrape down the sides to ensure no chunks remain. A smooth purée ensures a smooth fruit leather.
- Sweeten and brighten: Add honey and lemon juice to the purée and blend briefly to combine. Taste the mixture and adjust the honey as needed depending on the sweetness of your fruit.
- Strain (optional): For an ultra-smooth texture, strain the purée through a fine mesh sieve to remove seeds, though this step is optional.
- Spread evenly: Preheat your oven to 170°F (75°C) or the lowest temperature available. Line a baking sheet with parchment paper or a silicone baking mat. Pour the fruit mixture onto the sheet and spread evenly into a thin, consistent layer about 1/8 inch thick to ensure even drying.
- Bake low and slow: Place the tray in the oven and bake for 4–6 hours until the fruit feels dry to the touch but remains slightly tacky without any wetness in the center. This slow baking process intensifies the fruit’s natural sweetness and flavor.
- Cool and roll: Allow the fruit sheet to cool completely. Using scissors or a sharp knife, cut into strips. Roll each strip with the parchment paper to create classic fruit roll-ups ready to enjoy.
Notes
- Use any fresh fruit you like, such as mango, peach, or mixed berries, adjusting sweetener accordingly.
- Straining the purée removes seeds for a smoother texture but is optional based on preference.
- Keep the fruit layer thin and evenly spread for consistent drying and best texture.
- Store finished roll-ups in an airtight container at room temperature for up to 2 weeks.
- Adjust the amount of honey or maple syrup based on the sweetness of the fruit used.


